TunePat Deezer Music Converter is a professional audio converter specially designed for Deezer users. It can help users easily obtain songs with HiFi quality from the Deezer web player and save them to their computer in MP3, AAC, WAV, FLAC, AIFF, or ALAC formats. In addition, TunePat Deezer Music Converter also provides users with some useful tools. Below, we will provide detailed instructions on how to register and use this program:
How to Register TunePat Deezer Music Converter
Step 1 Run TunePat Deezer Music Converter and click on the Menu > Register tab to open the registration dialog box below and complete the registration process.
Step 2 Then copy and paste the registration Email and Code into the registration dialog box. Click on Register button.
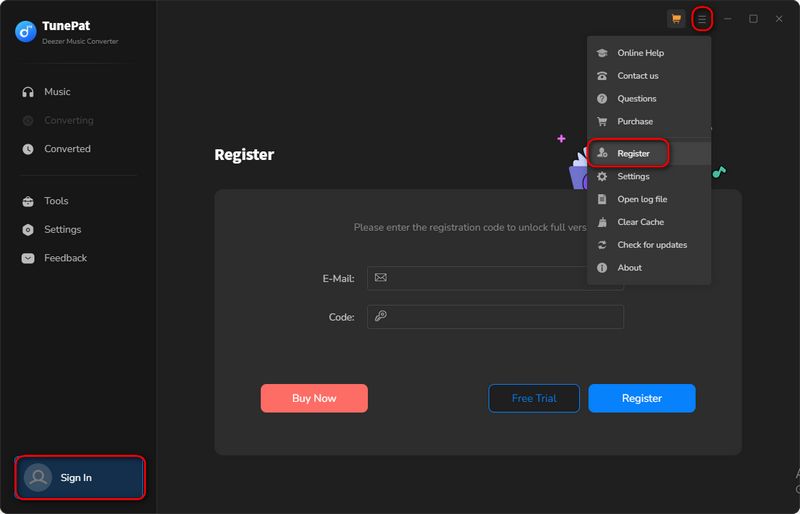
Note: Please do not add a blank at the beginning or the end of the license.
How to Use TunePat Deezer Music Converter
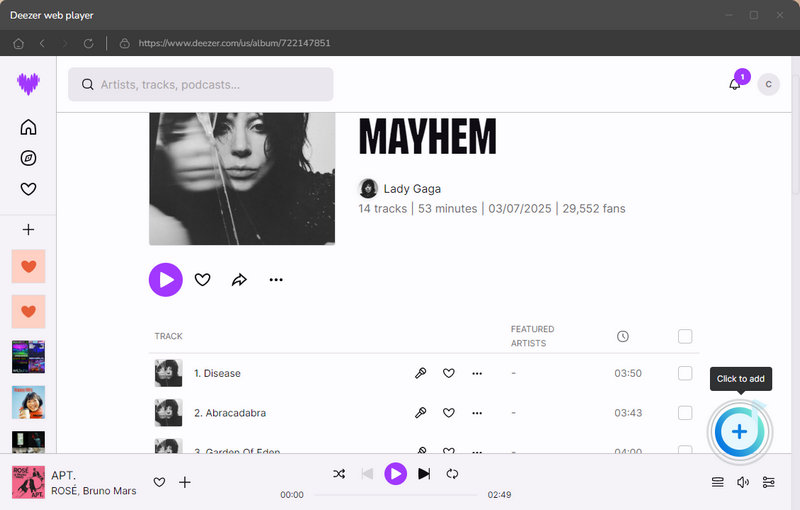
Step 1 Launch the TunePat Deezer Music Converter on your computer and follow the instructions to log in to your Deezer account within the Deezer web player window. The Deezer web player is embedded in TunePat by default. If you want to access it in a new window, click the "Pop out Player" button.

Step 2 Click on the "Settings" ![]() button on the lower left corner to choose the Output Format (MP3/AAC/WAV/FLAC/AIFF/ALAC), Bit Rate, and Sample Rate and more other parameters.
button on the lower left corner to choose the Output Format (MP3/AAC/WAV/FLAC/AIFF/ALAC), Bit Rate, and Sample Rate and more other parameters.
Note: If you choose Auto as the output format, the Deezer converter will download deezer music with the original format and sound quality.
For better organizing your music library, you can save the output audio files into an organized folder like Artist, Album, Playlist. In addition, you can customize the output file name, and choose a output folder by yourself to locate the converted files easier.
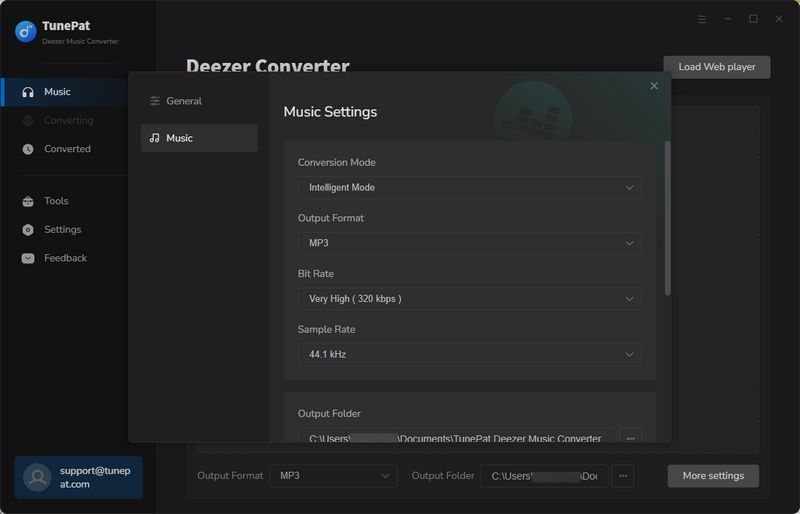
Tips: Simply select the Save lyrics (if provided) option if you want to save the lyrics of the Deezer songs you choose. TunePat will save them to LRC format when you turn this setting on.
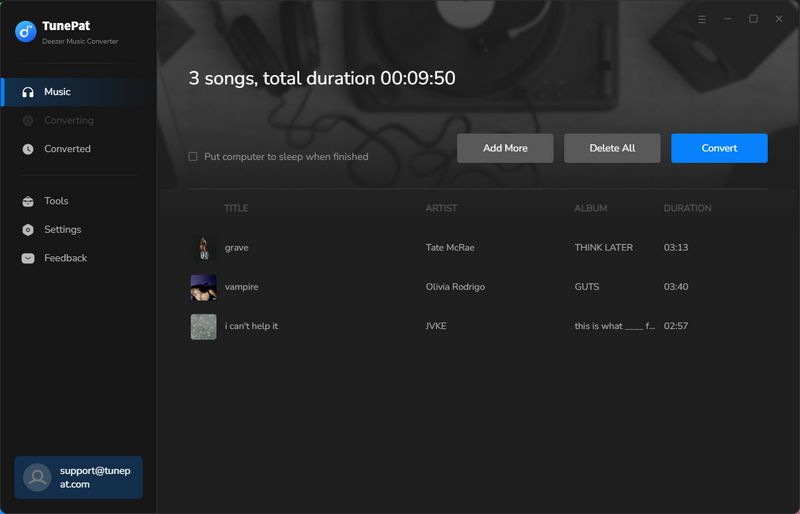
Step 3 Open a song, playlist, artist or album from Deezer library, then click on the "+" button and TunePat Deezer Music Converter will analyze the list automatically.
Select the titles that you'd like to convert on the pop up. Click the "Add" button. If you want to avoid repeated downloads, you can click "Filter Converted".

Step 4 Click on the "Convert" button to start converting the Deezer songs to the output format you chose.
Tips: If you need to convert multiple playlists at once, click the "Add More" button or select the Deezer web player on the screen. Then browse other songs or playlists you want to add. Click on the "Click to add" button and pick more songs as what you do in Step 3. After adding all your target songs, click the "Convert" button to start downloading Deezer songs.
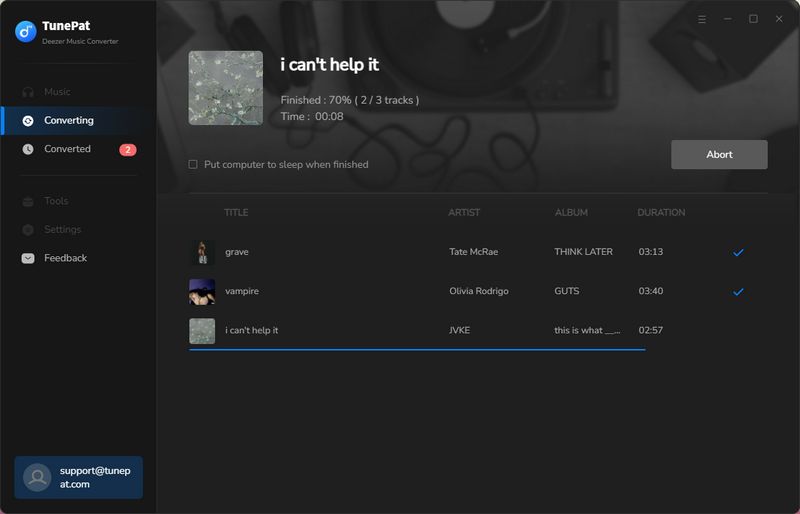
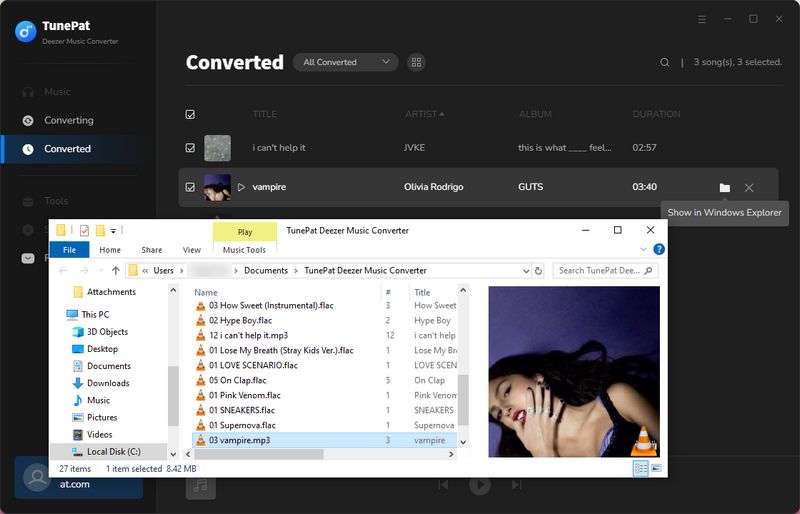
Step 5 When all the selected Deezer songs are downloaded successfully, you can view the converted contents in the "History" section. Double click to play. Or you can open its local folder and then freely edit, use, or move the converted Deezer local music files.