TunePat Spotify Converter is a feature-rich and user-friendly software that allows you to effortlessly download and convert Spotify music to a variety of formats, including MP3, AAC, WAV, FLAC, AIFF, ALAC, and more. With this program, you can enjoy your favorite Spotify tracks offline on various devices. In this tutorial, we will guide you through three main sections: the registration process, how to use the program for Spotify song conversion, and the utilization of its handy tools, ensuring a seamless introduction to this exceptional software.
1. How to Register TunePat Spotify Converter
TunePat Spotify Converter is easier to use than other Spotify music converters. The users can add songs from the Spotify app or web player, and the speed can be up to ten times. And before you start using the program, the first step is to register the program with your license key. Proceed as follows:
Step 1 Click on the ![]() > Register or your avatar in the lower left corner to open the registration window below and complete the registration process.
> Register or your avatar in the lower left corner to open the registration window below and complete the registration process.
Step 2 Then copy and paste the registration Email and Code into the registration pop-up Window. Click on Register button.
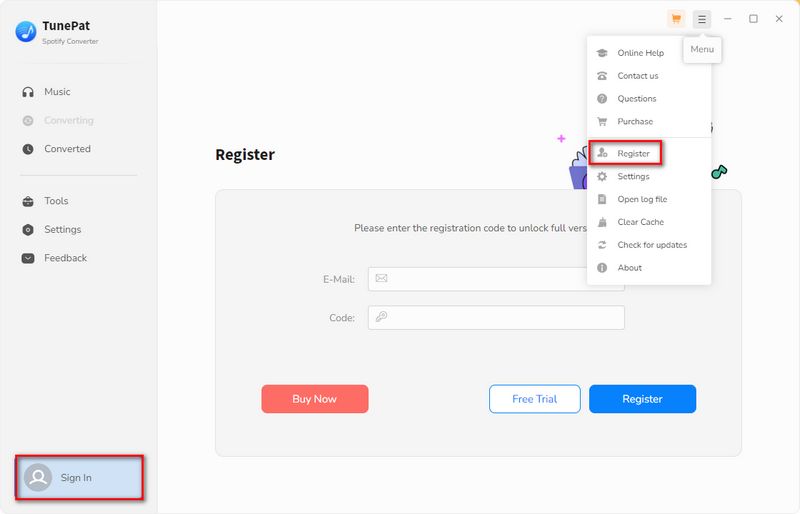
*Note: Please not add any blank characters at the beginning or end of a word.
2. How to Download Spotify Songs to Your Computer
Let's see how to download Spotify songs to your computer.
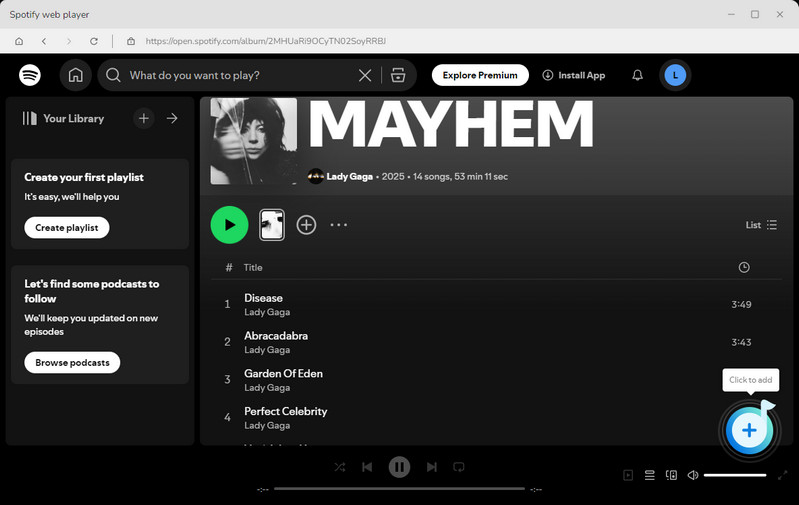
Step 1 Choose to Convert from Spotify App or Web Player
TunePat can convert Spotify music from Spotify app or Spotify web player. The conversion speed and audio quality between them are slightly different. For details, please see: App VS. Web Player Music Downloading.
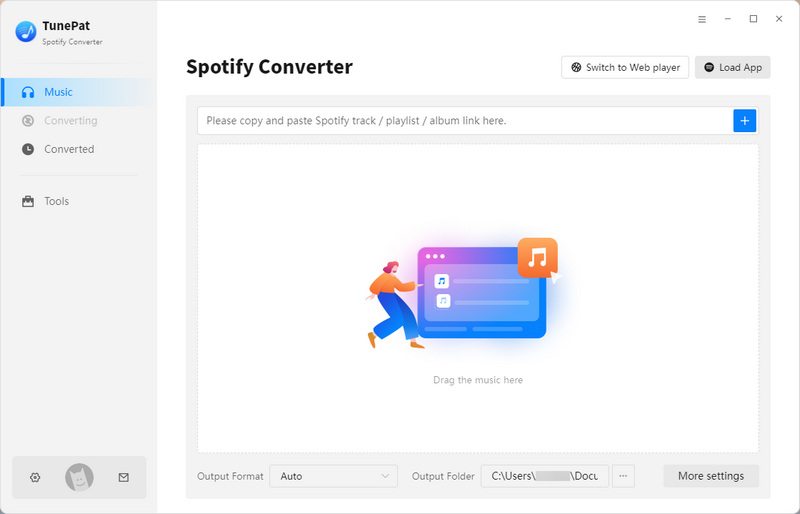
When you open the program, you can see the interface below. To change the audio source, you can click the button Spotify App. Here, you can decide to choose convert music from the Spotify app or the Spotify web player. After you select the sound source, please log in to your Spotify Free or Premium account.
*Tips: When you convert songs from Spotify App, open the Settings module, you will find that the Enable one click add in Spotify desktop app feature is enabled by default, which means you can analyze the songs you want with one click. You can also parse the Spotify music with the 2 methods below:
Method 1: Directly drag and drop the desired content from the Spotify app to the "Drag the music here" area on the home page interface.
Method 2: Copy and paste the link of the Spotify content into the blue box and tap on the "+" button for analysis.
Step 2 Customize the Output Parameters
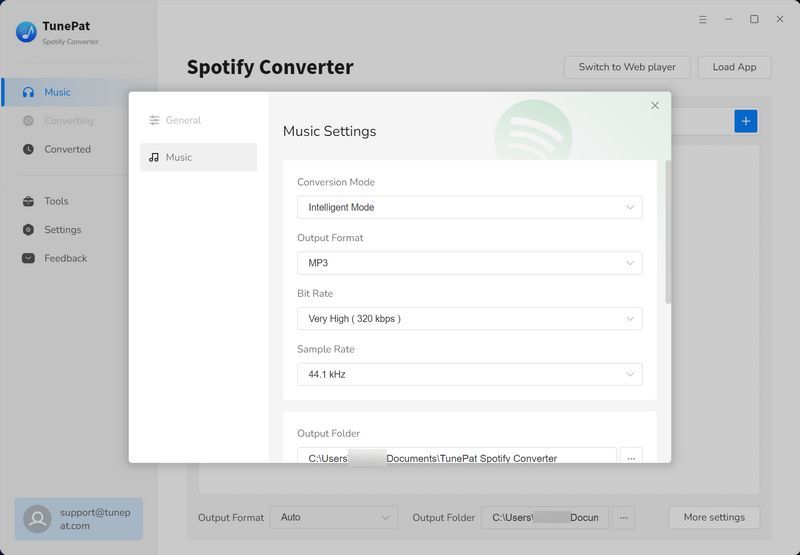
To export and save Spotify songs based on your preferences, please click the settings icon and select the necessary parameters first.
The settings interface allows you to customize various options, such as the conversion mode, output format (MP3, AAC, FLAC, WAV, AIFF, ALAC), bit rate, sample rate, output folder, and whether to enable automatic pop-up windows after conversion. Moreover, you can choose how to name Spotify music files and organize them according to your needs. The user-friendly and diverse settings can cater to individual requirements.
*Tips:
1.When you choose "Record Mode" under the Conversion Mode column, you will find a Convert Speed option. When your internet speed is not good, to ensure the output quality of your audio files, please slow down the conversion speed. Supported conversion speeds are 1X, 5X, and 10X.
2. In the Settings menu, there is a toggle button for "Save lyrics (if provided)". By default, this feature is disabled. To export your song's lyrics file, toggle on this button. TunePat will then automatically recognize, download, and save the Spotify lyrics in either LRC or TXT format.
Step 3 Select Spotify Music to Convert
Now, please browse the Spotify songs, albums, playlists, or podcasts you want to convert. If you download music via the Spotify web player, for better browsing, you can click "Pop out Player" to have Spotify web player pop up. To add the items you want, please click the "+" button, and TunePat will automatically read these tracks and arrange the convertible songs in the pop-up window.
To prevent duplicate song files in the same location on your computer, enable the Filter Converted option in this step. When activated, TunePat will detect existing tracks and gray them out, making them unselectable in the current list. After that, tick off the Spotify songs you like and click Add button to the next step.
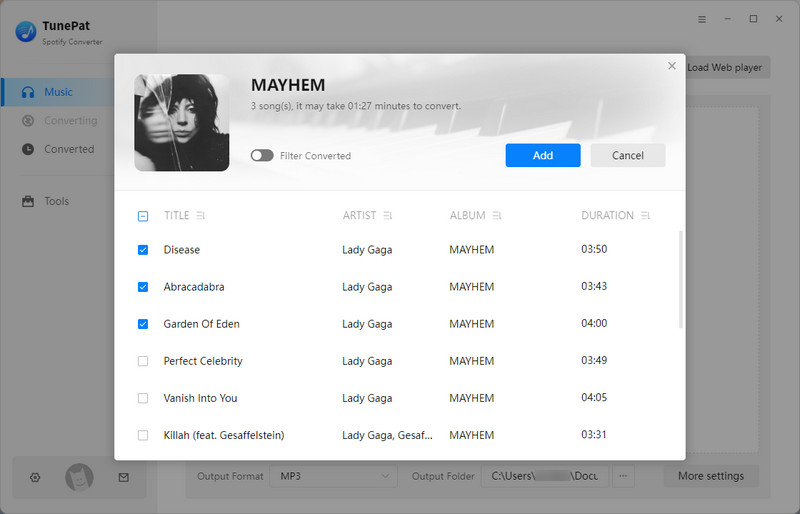
Want to download videos along with music or podcasts? You can check "Also download the music video (If provided)" at this step. Please note that this feature is currently only available to Spotify Premium users who converted from the Spotify web player.
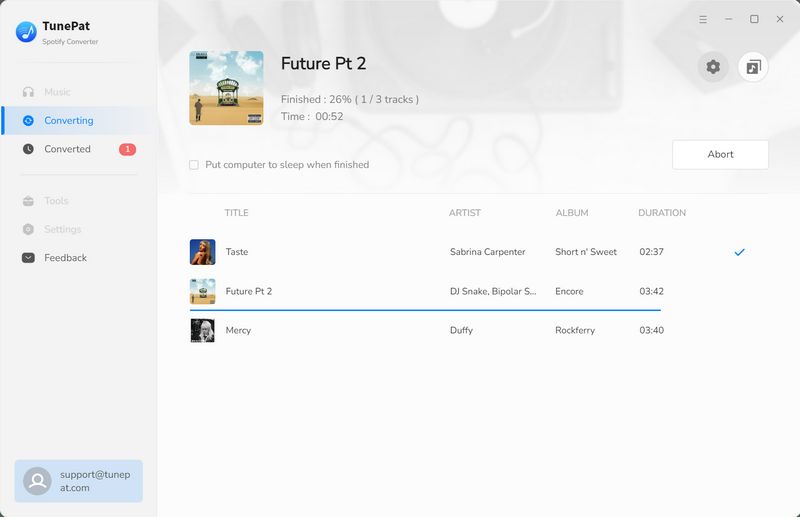
Step 4 Convert & Download Spotify Music to Your Computer
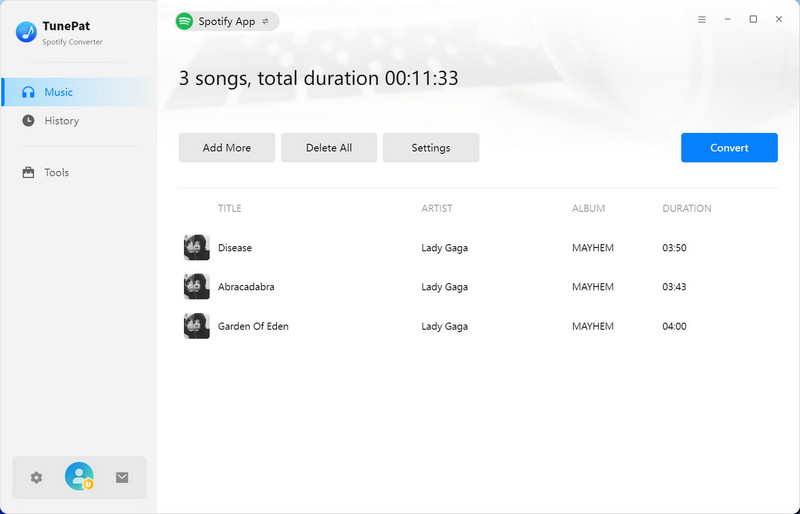
There are some selectable buttons after completing the setup and returning to the TunePat interface. If you click Add More, you can continue choosing songs from other playlists or albums. If you choose the Delete All button, the current list will be cleared with one click. If you forgot to change some settings, you can click Settings to go back to the settings page again. If all these have been done, please click the Convert button to start the conversion immediately.
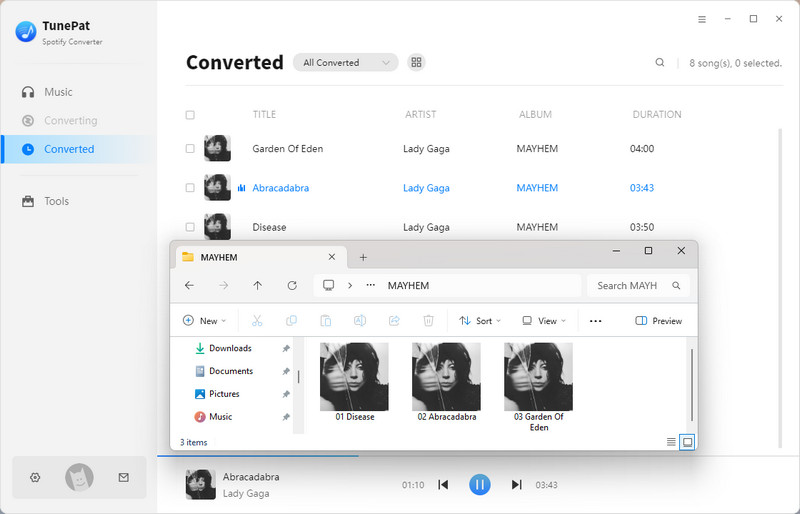
Step 5 View the Converted Spotify Music
After the conversion is completed, you can click on the "History" to check the conversion history. You can play these songs within TunePat, or you can find the converted music from the local drive and then transfer them to any other devices you like.