Share Playlists on Apple Music
As we all know, Apple Music is one of the most used apps for online music streaming that enables users to make and share playlists with others. Users can make customized playlists on Apple Music with a wide range of genres to pick from and share them with friends and family using AirDrop, Messages, Mail, or social media. A terrific approach to exposing friends to your favorite music is through sharing playlists. On Apple Music, it's simple, however, occasionally there may be issues.
Here, we'll walk you through the process of sharing Apple music playlists on different devices.

Part 1. How to Share Apple Music Playlists on iPhone and iPad
Sharing your Apple Music playlists on iPhone and iPad is a straightforward process that can be done in just a few simple steps. Here are two methods to show you how to do it:
🢒#Method 1
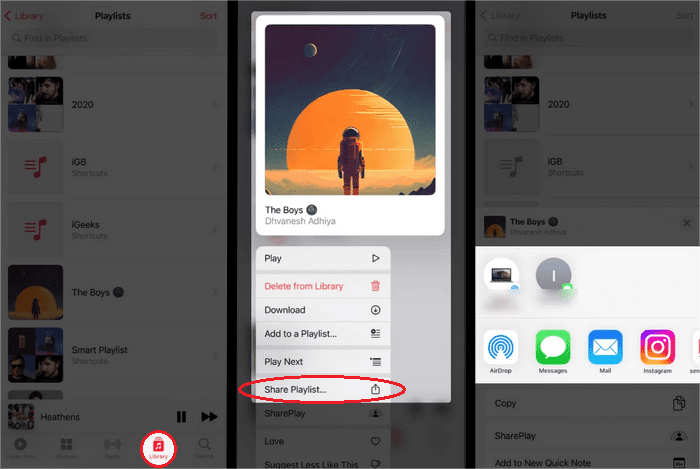
Step 1 Launch Apple Music and tap "Library" at the bottom.
Step 2 Press the playlist you want to share.
Step 3 Tap "Share Playlist".
Step 4 Choose how you want to share like AirDrop, Messages, Mail, or social media.
🢒#Method 2
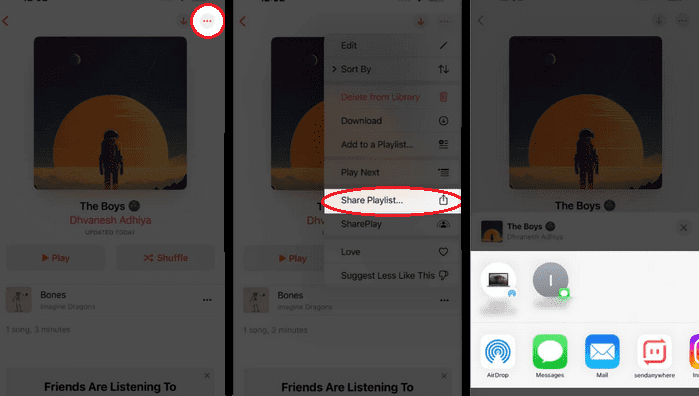
Step 1 Open the playlist you want to share.
Step 2 Select "..." at the top right corner.
Step 3 Tap "Share Playlist…".
Step 4 Choose how you want to share like AirDrop, Messages, Mail, or social media.
Part 2. How to Share Apple Music Playlists on Android
There is also more than one way to share Apple Music playlists for Android users. Two options are as follows:
🢒#Method 1
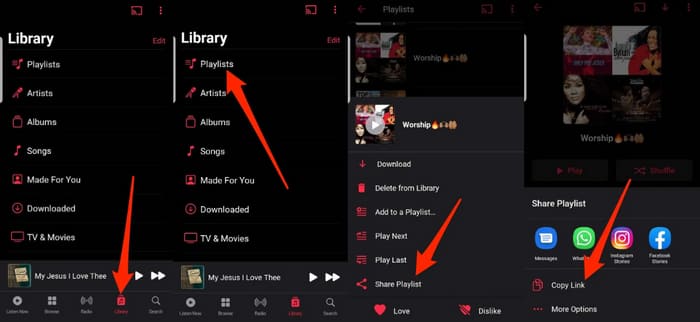
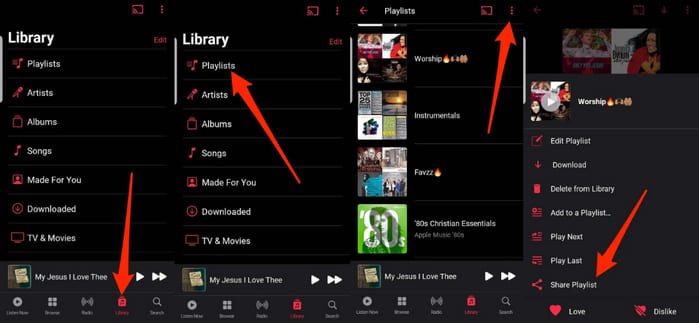
Step 1 Launch Apple Music on your Android device and tap “Library”.
Step 2 Tap "Playlists".
Step 3 Choose the playlist you want to share and tap "Share Playlist".
Step 4 Select "Copy Link" or "More Options" to share the link with others via apps like Instagram, Facebook, and more.
🢒#Method 2
Step 1 Tap the "Library" tab.
Step 2 Tap "Playlists".
Step 3 Choose the playlist you’d like to share and then tap "..." at the upper right corner of the screen.
Step 4 Tap "Share Playlist" and then select "Copy Link" or "More Options" to share playlists with others.
Part 3. How to Share Apple Music Playlists on Mac/PC
Step 1 Launch iTunes or Apple Music.
Mac users can open Apple Music directly while PC users can access iTunes or go to the Apple Music website on any platform.
Step 2 Select a Playlist and click the three dots.
You can view a menu of choices by pressing the three-dot icon.
Step 3 Select "Share".
When you click the "Share" button, you will see a variety of sharing choices as well as a copy link option that takes you directly to your playlist. Choose how you want to share your playlist after that.
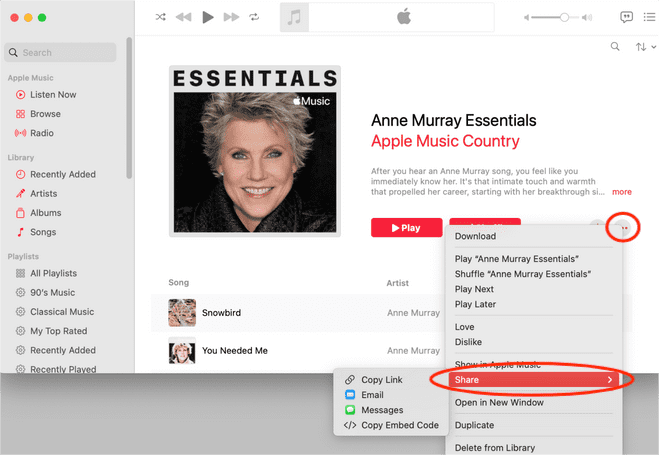
By following the easy three steps you can share your Apple Music playlist at any time.
Part 4. General Solutions to Try When You Fail to Share Apple Music Playlists
Method 1: Remove Content and Privacy Restrictions.
Go to Settings > Screen Time > Content & Privacy Restrictions in iOS or iPadOS. Make sure it's disabled and try again after restarting your iPhone.
Method 2: Disconnect from a VPN.
Make sure a VPN is not active on your device. In Settings > General > VPN & Device Management, you can locate this.
Method 3: Check Device Management Profiles.
Check to see if a device management profile is to blame. Look for any configuration profiles you're not using in Settings > General > VPN & Device Management once more. Restart your iPhone after removing them, then try again.
Method 4: Check Your Time and Date Settings.
Lastly, confirm that your time and date settings are all correctly configured. These options can be found under Settings > General > Date & Time.
Most people should be able to resolve the issue using these four instructions. If you're still having problems, contact Apple support for more guidance since it may be an indication of more serious problems with your device settings or Apple Music account.
The methods mentioned above allow you to share Apple Music playlists from your computer or phone, but Apple Music will only save your playlists for a brief period of time. Any music you added to your playlist and downloaded to your devices won't be available if you cancel your Apple Music membership. Can one obtain Apple music in an unencrypted audio format then? Third-party tools, such as TunePat Apple Music Converter, are required at the moment.
Part 5. How to Save Apple Music Playlists Forever
TunePat Apple Music Converter can help you export your favorite playlists from Apple Music and save them locally in MP3, AAC, FLAC, WAC, AIFF, or ALAC format. You may receive Apple Music tracks with the original sound quality and ID3 tags thanks to the converter's fast speed operation without sacrificing the song's quality. The application interface has a contemporary, user-friendly design. Let's examine the particular stages with just a few quick clicks.
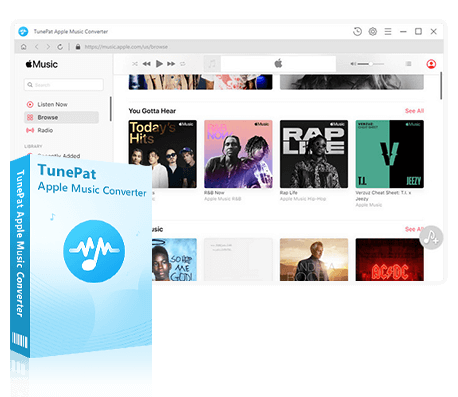
TunePat Apple Music Converter
TunePat Apple Music Converter helps you download and convert all Apple Music songs and playlists to MP3 and other common formats.
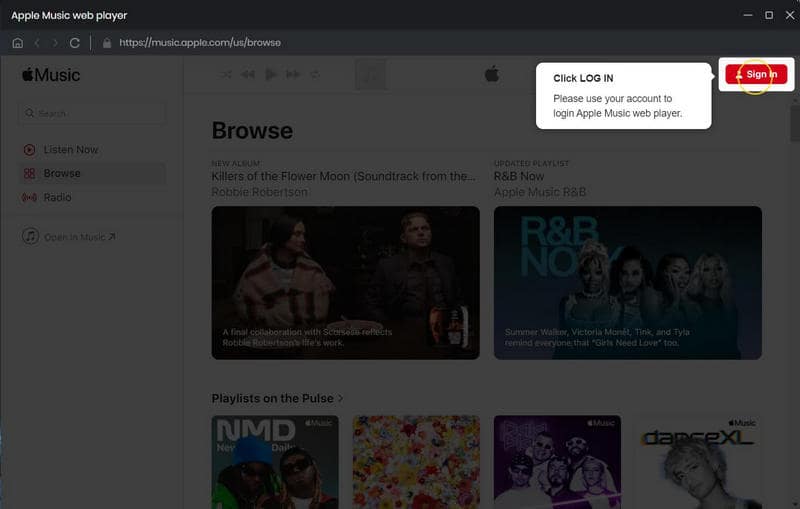
Step 1 Log in to TunePat with your Apple ID.
Activate TunePat Apple Music Converter. Select "Open Apple Music Web Player" from the menu. Then, you must adhere to the on-screen instructions to access the account login window and log in using your Apple ID. Once signed in, you can browse your Apple Music library.
Step 2 Customize the Output Parameters of Apple Music Playlists.
Click the "Gear" button in the menu bar's upper right corner before you begin converting your playlists. You must finish customizing the output parameters in this options box first, including the output format (MP3 is typically preferred), output sound quality, output file name, etc.
The following contents are editable:

Tips: When it comes to "Output Organized", "Playlist" is recommended to choose. Whether you download the whole playlist or just a few songs in it, the order of the songs in the playlist will not be changed and all downloaded songs are automatically grouped in a folder named after the playlist name, which is very convenient.
Step 3 Convert Your Apple Music Playlists to PC.
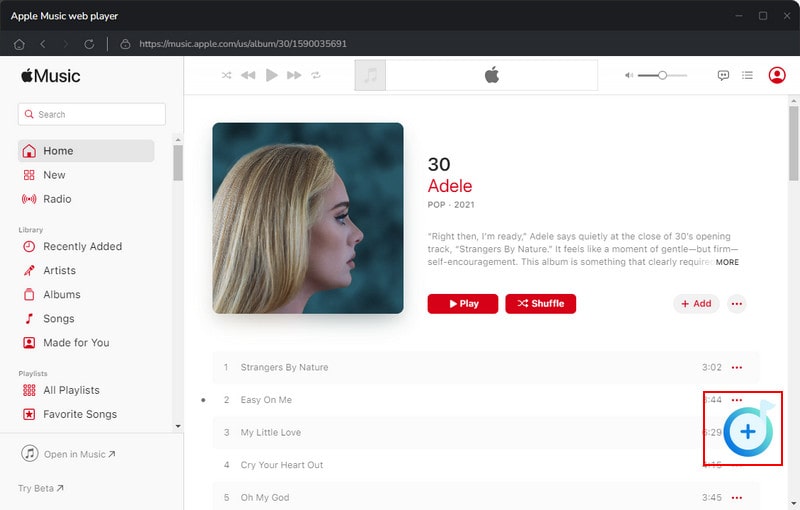
Go directly to the playlist you want to convert and click the blue "Add to list" button in the lower right corner. All of the songs on your playlist will be instantly recognized by TunePat. You have the option to freely select all of the songs with a single click or only a few of them.
If you only want to convert the currently selected playlist, click on the "Convert Now" button to start the conversion process. Select "Save to list" to temporarily save the chosen songs if you wish to convert songs from several separate playlists at once. Then, to complete the one-time conversion and download, click "Convert".
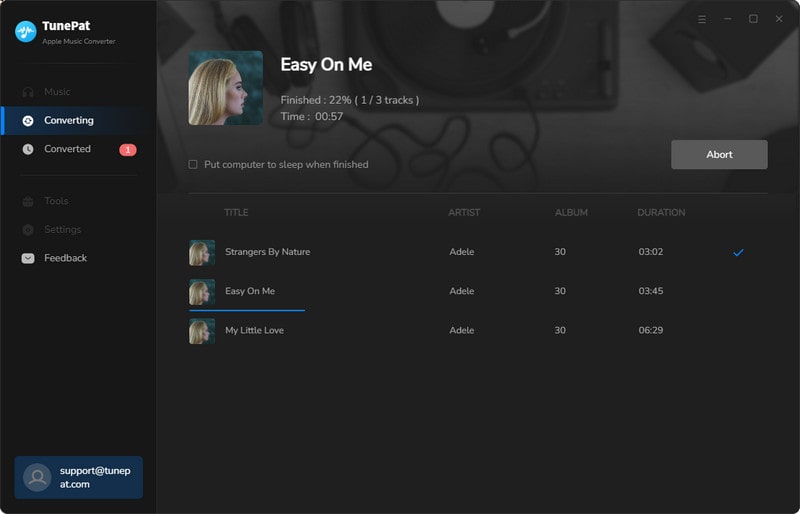
Then you just need to wait for a short time until the conversion is complete. After the conversion is complete, you can transfer these files to other portable devices, play them without limitation, and keep Apple Music playlists forever.
Conclusion
In conclusion, Apple Music is a well-known music streaming service that gives customers access to custom playlists. It is available on multiple platforms and is cost-effective for all walks of life to enjoy their favorite music.
In this article, we introduce the methods of sharing Apple Music playlists on different devices, four general solutions to fix the failure of sharing a playlist, and also a practical tool that keeps Apple Music playlists forever——TunePat Apple Music Converter. It can help you convert Apple Music to a common audio format and save it forever. For the download and installation of this fantastic program, click the icon below.
