Top 8 Spotify Equalizers You Need to Know
Music streaming has become an integral part of our lives in today's digital age. We can access an incredible library of songs, albums, and playlists with platforms like Spotify. While modern audio technology has come a long way, there's always room for customization to ensure we enjoy our favorite tunes to the fullest. This is where the Spotify Equalizer comes into play.
In this guide, we'll delve into the world of equalizers, explore how to access and utilize the Spotify Equalizer on different devices, and highlight the top 8 third-party Spotify equalizers for Windows and Mac that can elevate your music listening experience.
- Part 1: What is Spotify Equalizer and What Can the Spotify Equalizer Do?
- Part 2: How to Access Spotify Equalizer Officially? (iOS/Android/PC)
- Part 3: Why Users Choose the Third-party Spotify Equalizers?
- Part 4: Top 8 Best Spotify Equalizers on Windows and Mac - How to Use Them
- Part 5: How to Download and Play Spotify on a Spotify Equalizer

Part 1: What is Spotify Equalizer and What Can the Spotify Equalizer Do?
The Spotify Equalizer is an essential tool within the Spotify app that enables users to modify the audio output by adjusting the levels of different frequency bands. It allows listeners to tailor the sound to their liking, optimizing the audio experience for various music genres and preferences. An equalizer allows users to manipulate the bass, midrange, and treble frequencies to amplify or diminish specific elements of a song. This can significantly enhance the audio quality, optimize playback for different headphones or speakers, and even compensate for less-than-ideal listening environments.
By leveraging Spotify Equalizer, listeners can bring out the rich tones of instruments, enhance vocals, or emphasize the thumping bassline according to their unique musical inclinations. For example, classical music enthusiasts might prefer a balanced equalizer setting that highlights the nuances of orchestral instruments. In contrast, bass-heavy genres like electronic dance music (EDM) might warrant a setting that amplifies the lower frequencies.
Part 2: How to Access Spotify Equalizer Officially? (iOS/Android/PC)
Using the Spotify Equalizer on Your iPhone/iPad/iPod:
Step 1 Launch the Spotify app on your iPhone. Locate the "Your Library" tab positioned at the lower-right corner of the screen. Tap the "Settings" icon situated in the upper-right corner.
Step 2 Inside the settings window, select "Playback". This action will unveil the "Equalizer" option. Activate the equalizer by toggling the switch.
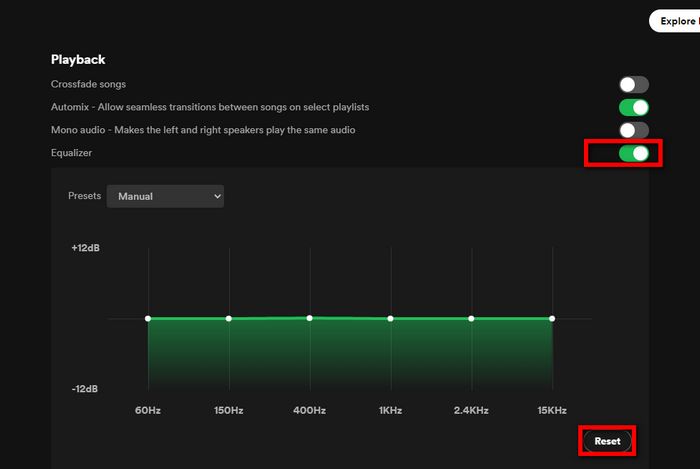
Step 3 A series of preconfigured equalizer presets catering to different music genres will be presented. In Spotify's context, the frequency ranges translate to distinct audio components: 60Hz to 150Hz corresponds to the bass, 400Hz to 1KHz embodies the midrange, and 2.4KHz to 15kHz signifies the treble. To attain optimal auditory bliss, manipulate the settings by dragging the petite white dots.
Step 4 Once your desired adjustments are in place, select a preset that resonates with your musical inclinations. With your customizations intact, return to the home screen and revel in a personalized auditory journey through your Spotify music.
Using the Spotify Equalizer on Your Android Device:
Step 1 Initiate the Spotify app on your Android device. Navigate to the "Library" tab located at the bottom-right corner. Proceed to the "Settings" option.
Step 2 In the "Music Quality" segment, scroll down until you unveil the "Equalizer" button. Tap the button. If a prompt emerges, simply click "OK" to proceed.
Step 3 It's noteworthy that diverse Android manufacturers extend the option for users to employ their preferred equalizer, distinct from Spotify's default. You possess the liberty to cherry-pick an equalizer of your choice to calibrate music settings.
Step 4 Ensure that the Equalizer feature is activated, and embark on an exploration to unearth the setting that harmonizes seamlessly with your auditory inclinations. Once fine-tuned, immerse yourself in a realm of elevated audio quality while indulging in your beloved Spotify tracks.
Using the Spotify Equalizer on Your PC:
Step 1 Begin by configuring the Spotify desktop application on your PC and accessing your personal Spotify account. Locate the prominent 'Settings' button by navigating to the "Account" option.
Step 2 As you peruse the Settings menu, journey down until the "Equalizer" division comes into view. At this juncture, activate the Toggle button, which promptly grants you access to harness the prowess of the Spotify PC equalizer.
Step 3 The tapestry of audio enhancement is now within your grasp. Delve into the realm of Presets, offering an array of equalizer configurations tailored to your desires. After pinpointing your desired auditory landscape, finalize your decision by tapping the "Reset" icon, seamlessly applying your chosen equalizer profile.
Part 3: Why Users Choose the Third-party Spotify Equalizers?
While the Spotify app offers its own built-in equalizer, many users still opt for third-party equalizers due to several advantages and additional features that these external tools provide. Let's explore the reasons why users might prefer third-party equalizers over the built-in Spotify equalizer:
Advanced Customization: Third-party equalizers often provide more advanced and granular customization options compared to the built-in equalizer. Users can fine-tune specific frequency bands to a greater extent, allowing for a more precise adjustment of audio characteristics.
Enhanced Sound Quality: Some third-party equalizers are designed to enhance sound quality by offering advanced algorithms and signal processing techniques. These equalizers can provide improvements in clarity, dynamics, and overall audio fidelity.
Additional Presets: Third-party equalizers often come with a broader range of presets that cater to various music genres, headphones, speakers, and listening environments. This diversity allows users to choose presets that best suit their preferences and the type of music they're listening to.
Audio Effects: Many third-party equalizers offer additional audio effects beyond simple frequency adjustment. These effects can include reverb, surround sound simulation, spatial audio enhancements, and more, providing users with a more immersive and customizable listening experience.
Device Compatibility: Some third-party equalizers are designed to work across different audio playback sources, including music apps, videos, games, and more. This makes them versatile tools for enhancing audio quality across various contexts.
Equalizer Profiles: Third-party equalizers often allow users to create and save multiple equalizer profiles for different scenarios. This can be particularly useful for switching between headphones, speakers, or listening environments.
Visual Feedback: Certain third-party equalizers visually represent the audio spectrum, allowing users to see how different frequency bands are adjusted in real-time. This visual feedback can help users make informed decisions while adjusting their settings.
Compatibility with Old Devices: Some older devices might not have a built-in system-wide equalizer or might have limited equalizer options. Third-party equalizers can fill this gap and provide users with a way to enhance their audio experience on such devices.
Simply put, it is because third-party equalizers cater to users looking for a higher degree of control and a customized audio experience that fits their unique preferences and devices. Next, we will introduce 8 popular third-party Spotify equalizers, including simple tutorials!
Part 4: Top 8 Best Spotify Equalizers on Windows and Mac - How to Use Them
Now, let's explore the top 8 third-party equalizers that can be used on Windows, Mac, or Linux to enhance the Spotify audio experience. Each of these equalizers offers unique features and functionalities, enabling users to fine-tune their music playback. Here's how to use them:
1. Equalizer APO (Windows)
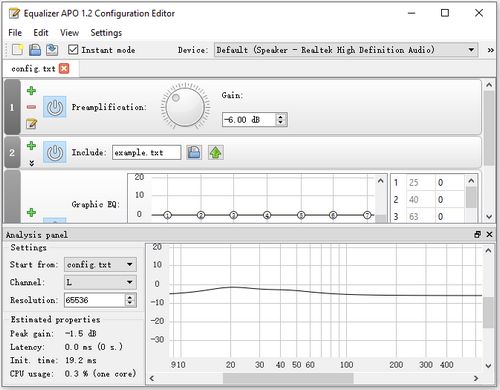
Equalizer APO serves as an open-source framework designed to process audio and function as a system-wide equalizer for Windows OS. It grants users the ability to implement diverse audio filters, equalization configurations, and effects to modify all audio output across their computer, without constraints related to the source or application. This tool operates at the driver level, implying that it alters audio prior to its delivery to the sound output hardware, enabling extensive and thorough audio customization.
How to Use Equalizer APO:
Step 1 Download and install the Equalizer APO software from its official website.
Step 2 Upon reaching the Kaleidosync Spotify visualizer website, log in to your Spotify account.
Step 3 Select Kaleidosync as the playing device for Spotify from the devices' list.
Step 4 Then play songs in your Spotify app and the visualizer begins.
2. Boom 3D (Windows and Mac)
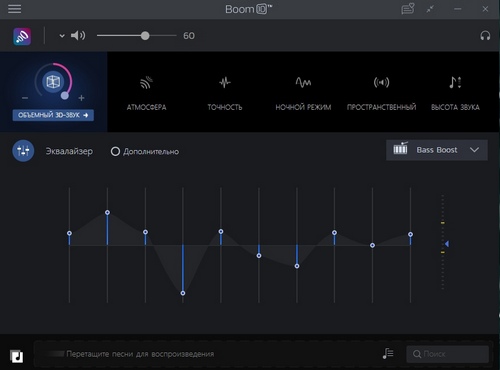
Boom 3D is a software application designed to enhance and improve audio playback on macOS and Windows operating systems. It offers a range of audio processing features that aim to provide a more immersive and high-quality listening experience for users.
How to Use Boom 3D:
Step 1 Install Boom 3D from the official website.
Step 2 Launch the Boom 3D application and select "Spotify" as the audio source.
Step 3 Boom 3D offers various equalizer presets, effects, and a customizable 31-band equalizer. Adjust these settings to enhance your Spotify audio.
3. Viper4Windows (Windows)
Viper4Windows is a free and open-source audio processing software for Windows operating systems. It is designed to enhance and modify audio playback by applying various effects, equalization, and other audio adjustments to improve the overall listening experience.
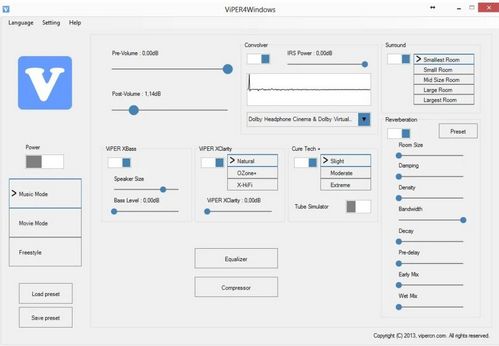
How to Use Viper4Windows:
Step 1 Firstly, Download and install Viper4Windows from a trusted source.
Step 2 After installation, configure the equalizer settings using the Viper4Windows control panel.
Step 3 Customize the equalizer bands, surround sound settings, and more according to your preferences.
4. Voxengo Marvel GEQ (Windows and Mac)
Voxengo Marvel GEQ is a digital equalizer plugin developed by Voxengo, a company known for creating high-quality audio processing software. Marvel GEQ is designed to be used within digital audio workstations (DAWs) and provides a graphical interface for equalizing audio signals. It has flexible band control, high-quality filters, spectrum analysis, preset management, and more features.
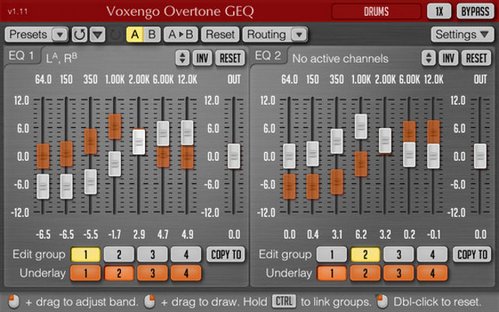
How to Use Voxengo Marvel GEQ:
Step 1 Download and install a DAW that supports VST plugins, such as Ableton Live, FL Studio, or Logic Pro.
Step 2 Install the Voxengo Marvel GEQ VST plugin within your DAW.
Step 3 Create a track in your DAW, load the Voxengo Marvel GEQ plugin onto the track's effects chain, and adjust the equalizer settings while playing Spotify through the DAW.
5. Equalizer for Spotify (Windows and Mac)
The Equalizer for Spotify is a Chrome extension that allows you to enhance Spotify audio directly within the Chrome browser.
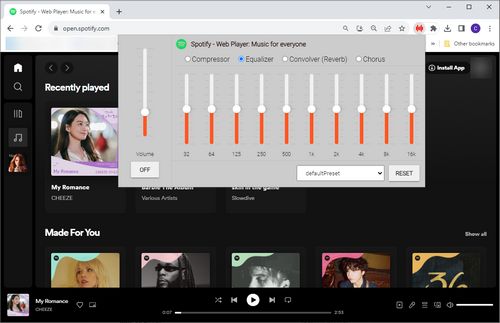
How to Use Equalizer for Spotify:
Step 1 Install the "Equalizer for Spotify" Chrome extension from the Chrome Web Store.
Step 2 Open Spotify in your Chrome browser and play the targeted song.
Step 3 Click on the Equalizer for Spotify extension icon in the Chrome toolbar to access the equalizer settings.
Step 4 Adjust the equalizer sliders to fine-tune the audio to your liking.
6. FXSound (Windows)
FXSound is a software application designed to enhance and improve the audio quality of music and other audio content on Windows-based computers. It provides a range of audio processing features that enhance the listening experience by applying various effects and optimizations, such as equalization, 3D sound effects, bass enhancement, presets, etc.
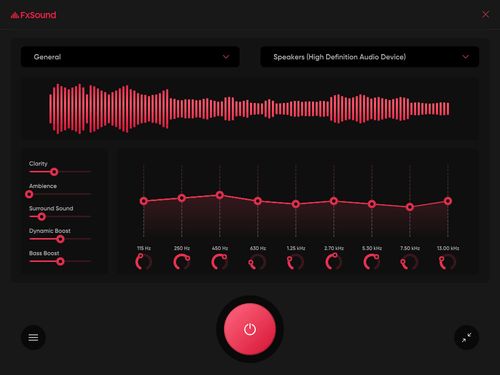
How to Use FXSound:
Step 1 Download and install FXSound program from the official website.
Step 2 Launch FXSound and select the equalizer tab to access the equalizer settings.
Step 3 Customize the equalizer bands and other audio enhancements to optimize your Spotify experience.
7. EasyEffects (Linux, Windows, Mac)
EasyEffects, previously named PulseEffects, is a no-cost and open-source GTK program designed for Unix-like operating systems. It offers a wide range of audio effects and filters that can be applied to both input and output audio streams. Originally utilizing the PulseAudio sound server for the effortless addition of effects to audio streams, it has since migrated to operate solely on the PipeWire sound server following a transition in 2021.
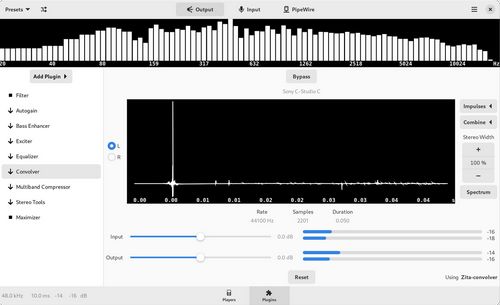
How to Use EasyEffects:
Step 1 Download and install EasyEffects from its official repository or website.
Step 2 Launch EasyEffects and configure the equalizer settings to modify the audio output of your Spotify playback.
8. Peace Equalizer (Windows)
Peace Equalizer is a software application designed for equalizing and enhancing audio on Windows operating systems. It is primarily used for adjusting and optimizing audio settings for headphones, speakers, and other audio output devices. The software offers a graphical user interface (GUI) that allows users to fine-tune audio parameters such as equalization, gain, and other audio effects. Peace Equalizer often works with other software or drivers, such as Equalizer APO (Audio Processing Object), an open-source audio processing framework for Windows.
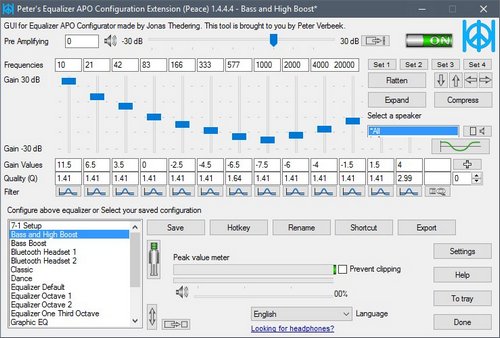
How to Use Peace Equalizer:
Step 1 Download and install Peace Equalizer from the official website.
Step 2 During installation, select the audio output device you want to apply the equalizer settings to.
Step 3 Open the Peace Equalizer interface to create and customize equalizer presets for your Spotify audio.
Part 5: How to Download and Play Spotify on a Spotify Equalizer
In fact, in addition to utilizing Spotify's built-in or third-party equalizers we mentioned above, there are many music players that include equalizer functions that allow users to adjust audio frequencies to customize their listening experience. For example, our commonly used Windows Media Player, Groove Music, iTunes, VLC, Foobar2000, MusicBee, and so on. And if we want to enhance Spotify songs on these music players, we need a converter to export Spotify from the Spotify app or web player to local files first. Only in this way can it be successfully identified.
We highly recommend you use the simple but efficient TunePat Spotify Converter. This is a one-stop converter, downloader, and offline player for Spotify Free and Premium users. It is capable of converting Spotify songs, albums, and playlists to MP3, AAC, WAV, FLAC, AIFF, and ALAC at 10X faster conversion speed with lossless output sound quality (with 320 kbps) while preserving converted ID3 tags.
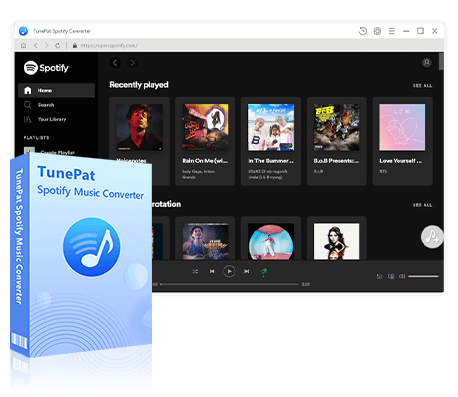
TunePat Spotify Converter
TunePat Spotify Converter enables users to convert and get Spotify songs or podcasts from the Spotify web player and then save them permanently.
Step 1 Choose a conversion mode
Launch TunePat Spotify Converter. You will find two different conversion modes on the start-up interface: App and Webplayer. The App conversion mode requires you to download the Spotify program on the computer in advance, while the Webplayer mode directly uses the web player embedded in TunePat.

Step 2 Select the Spotify songs you want to convert
If you choose the App conversion mode, you can drag the song you want to convert from the Spotify app after logging in or copy and paste its URL to the designated location of TunePat for analysis. If you choose Webplayer, log in to your Spotify account similarly, open the music you want to convert in the Spotify web player window and click "Click to add".
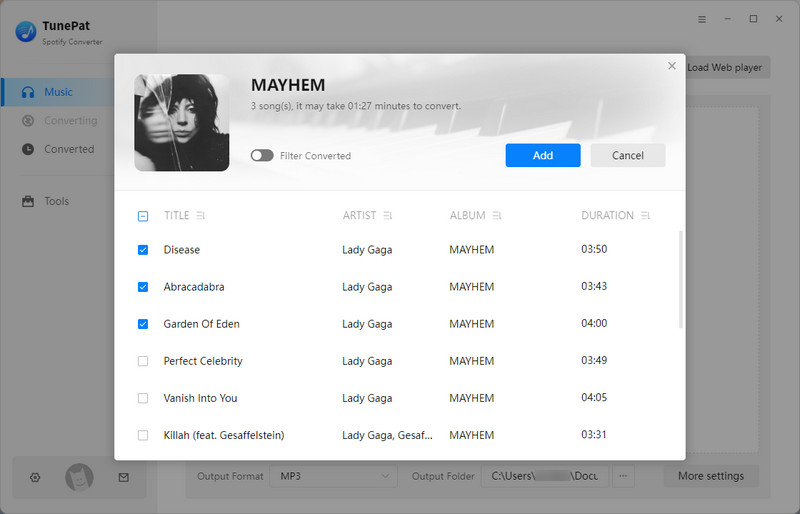
Then you will see a popup. All available songs are arranged in the popup window. Please check the titles you like, click "Add" to add these tracks to the Home page, and wait for the conversion.
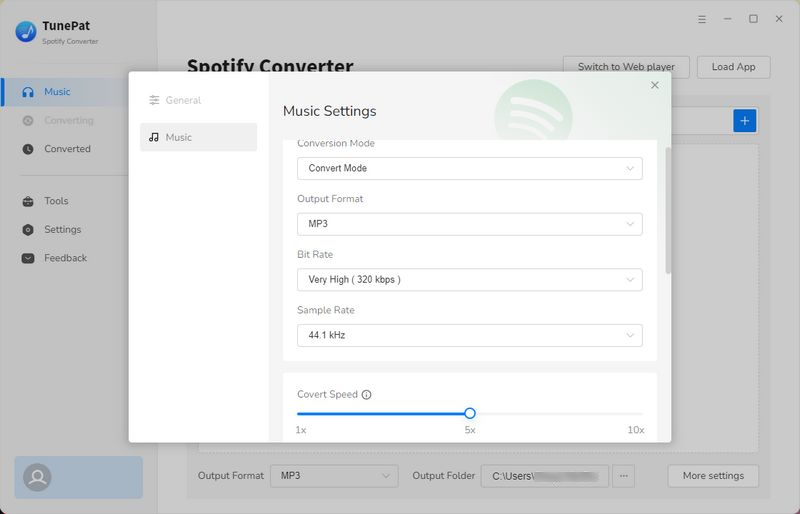
Step 3 Parameter selection in the setting interface
Before starting the conversion process, go to the "Settings" interface to customize output and conversion parameters, including conversion mode, output format options (Auto, MP3, AAC, FLAC, WAV, AIFF, and ALAC), bit rate, sample rate, output path, the output file name, and so on. If you want the output file to be consistent with the parameters of the source file, please do not change the Output Format column and use the default Auto.
Step 4 Convert Spotify music to the local computer
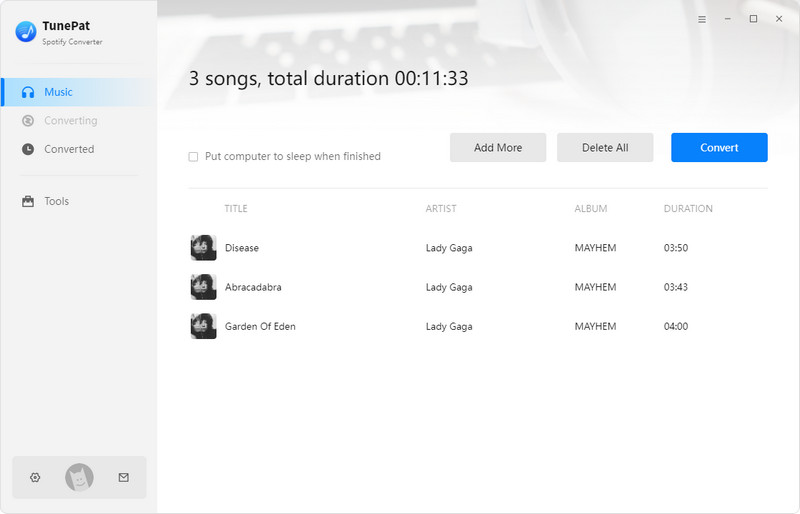
Please return to the Home interface after completing the settings. If you need to add more songs to the list, please click "Add More". To start the conversion, click "Convert".
Step 5 Finish the Equalizer settings on the music player
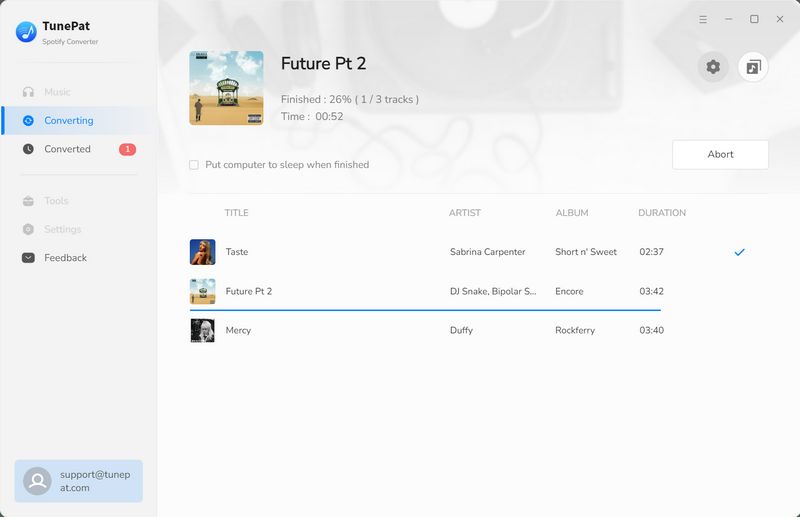
After the download is complete, click the "Converted" button in the lower left corner to browse all the historical records.
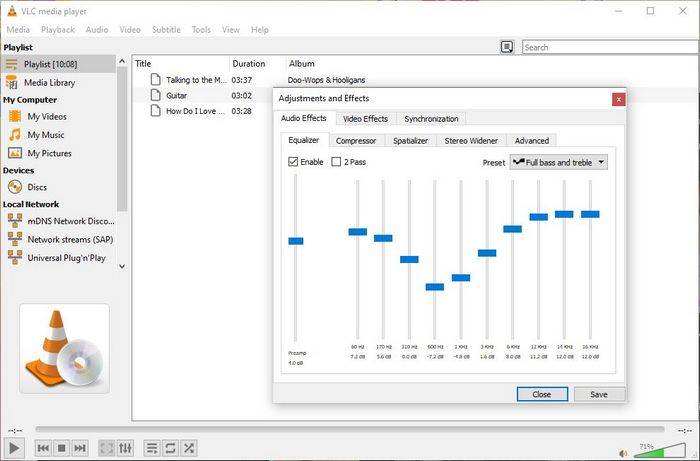
You can also click the "Show in Windows Explorer" button to the right of any track to bring up the local folder where the converted project is stored. You can drag and drop songs from here into your regular music player, like the VLC media player. Then click the "Tools" button in the navigation bar above the VLC media player and select the "Effect and Filters" option. Adjust the music playback effect here.
The Spotify Equalizer provides users with the ability to modify the levels of bass, midrange, and treble frequencies. This enables users to enhance or reduce specific aspects of a song, allowing them to fine-tune the audio according to the genre they are listening to. This enhancement ensures that Spotify users can enjoy an optimal and personalized listening experience. Moreover, apart from the built-in Equalizer settings in the Spotify app, we have introduced a selection of eight top-tier third-party Spotify equalizers. Furthermore, you also have the option to import Spotify songs into a music player to customize the audio effects. This feature is available in various music players, assuming you have acquired valid local files using the TunePat Spotify Converter.
