How to Download YouTube Music and Transfer to USB Flash Drive
YouTube Music is a popular streaming service by YouTube that lets you enjoy official songs, albums, playlists, artist radios, remixes, and live performances. You can also watch music videos directly through the mobile app or web player.
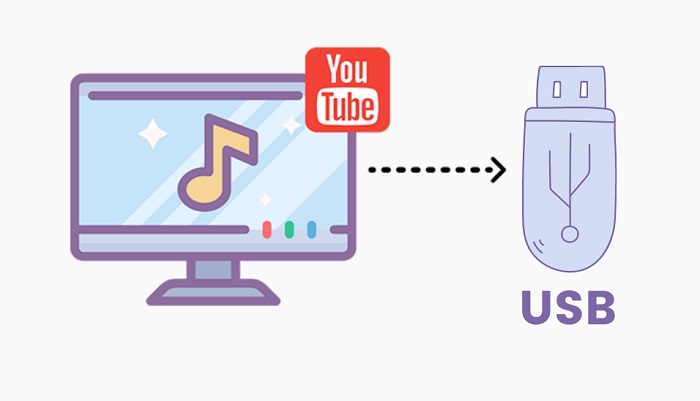
While YouTube Music offers a free plan with occasional ads, subscribers can download YouTube Music for offline listening. However, many users wonder: is it possible to transfer YouTube Music to a USB flash drive or download YouTube Music to USB directly? Unfortunately, YouTube Music doesn't allow direct USB downloads, since offline songs are stored as encrypted cache files.
Don't worry! In this guide, we'll show you how to download YouTube Music to your computer and then transfer YouTube Music to USB for offline listening anytime, anywhere.
Part 1. How to Download YouTube Music to USB?
Most USB drives support common audio formats such as MP3, WMA, AAC, M4A, and M4B. To transfer YouTube Music to a USB drive, you need a reliable third-party tool that can download YouTube Music songs in USB-compatible formats. TunePat YouTube Music Converter is one of the best options for this task.
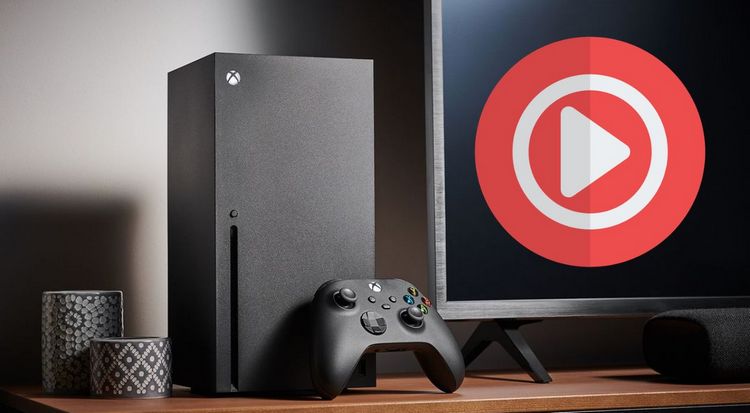
TunePat allows both free and Premium YouTube Music users to download songs, albums, and playlists at up to 10X faster speed. It converts YouTube Music to widely used audio formats including MP3, AAC, WAV, FLAC, AIFF, and ALAC, all while keeping the original lossless audio quality. Once downloaded, you can easily transfer YouTube Music to USB and enjoy your favorite tracks on any USB-enabled device, such as your car, PS5, Xbox One, and more.
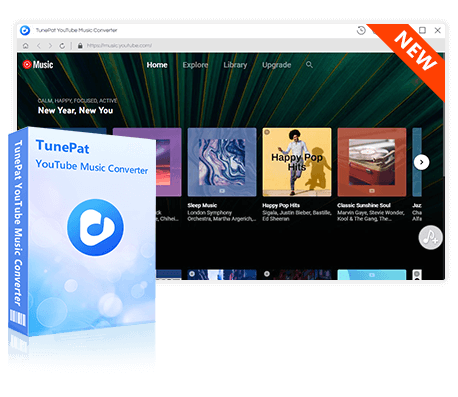
TunePat YouTube Music Converter
TunePat is a user-friendly music converter designed specifically for YouTube Music. It lets you grab, download, and convert content quickly and easily.
TunePat YouTube Music Converter works on both Windows and Mac. The free trial version offers full features with a minor length limitation. Click the "Download" button above to install it and follow the step-by-step guide below to learn how to download YouTube Music and transfer it to USB.
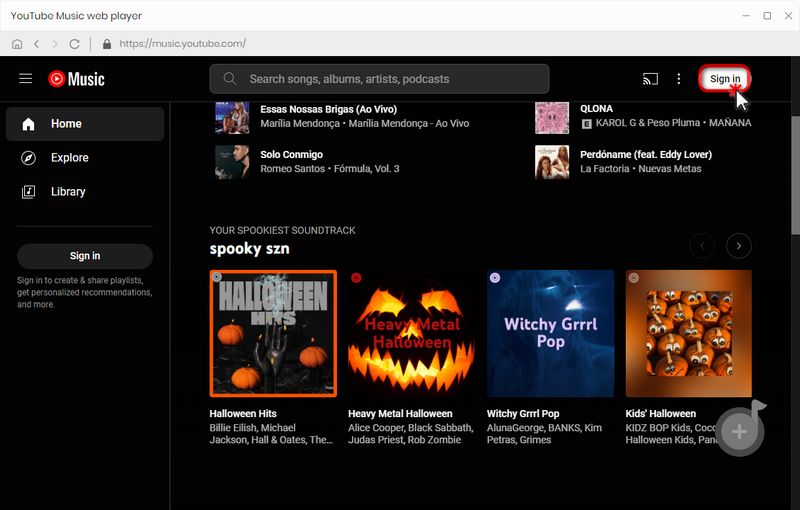
Step 1 Open the embedded YouTube Music web player in TunePat. You can choose "Pop out Player" or "Keep in Converter" to set the player's location. If it does not appear automatically, click "Open Web player" on the TunePat interface. Then click "Sign in" to log in to your YouTube Music account and access your music library.
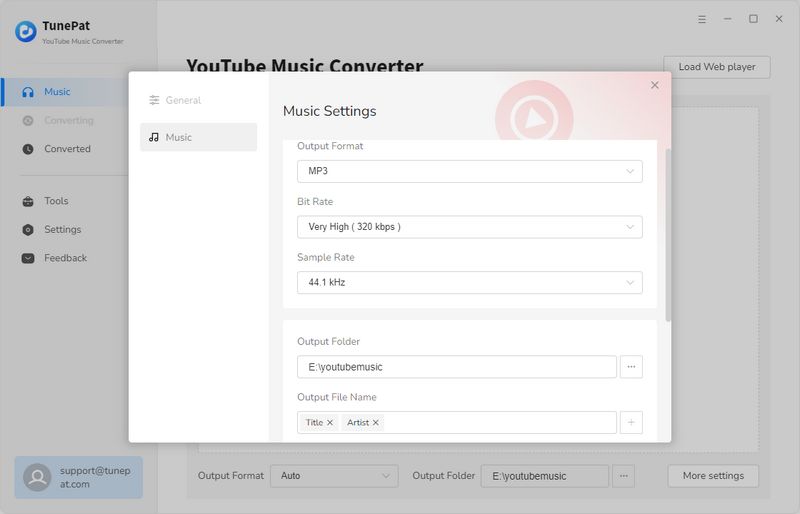
Step 2 Click "Settings" on the TunePat homepage to customize output settings. Adjust output format (Auto, MP3, AAC, FLAC, WAV, AIFF, ALAC), bit rate (128kbps–320kbps), sample rate (44.1–192 kHz), output folder, output file name, language, and more.
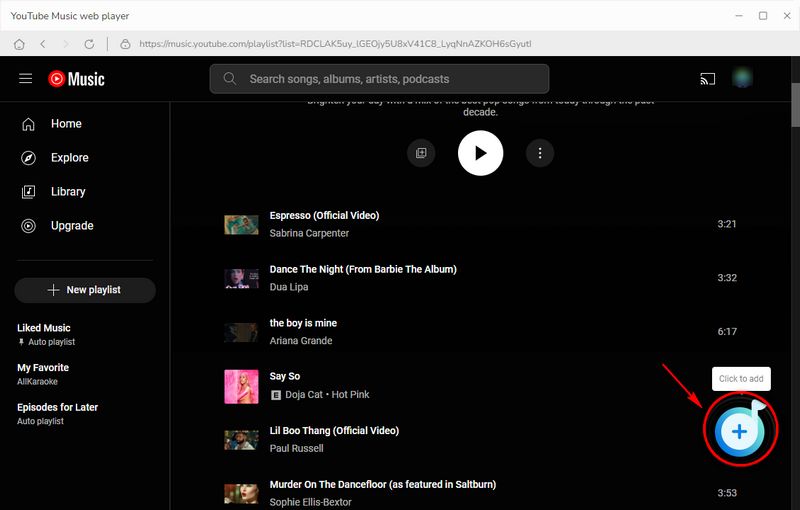
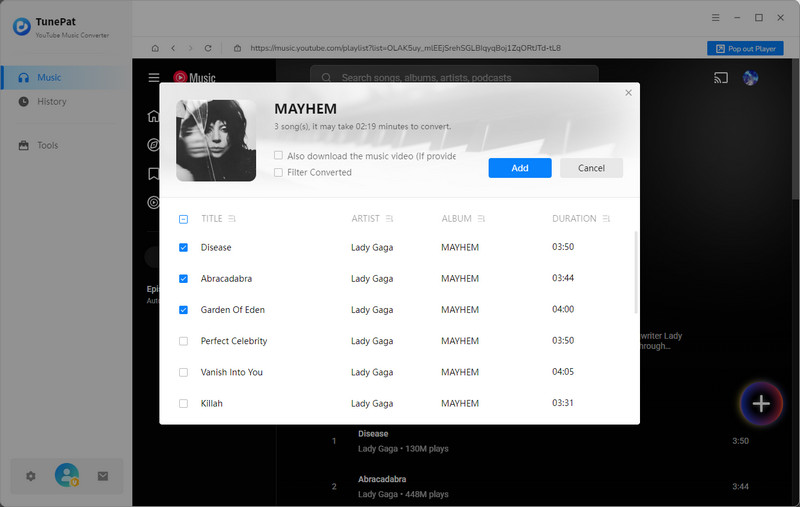
Step 3 Go back to the YouTube Music web player in TunePat and open the tracks you want to convert. Click the "+" button at the lower right corner. TunePat will automatically detect all available YouTube Music on the page in a pop-up window. Select the songs you want and click "Add" to add them to the conversion list.
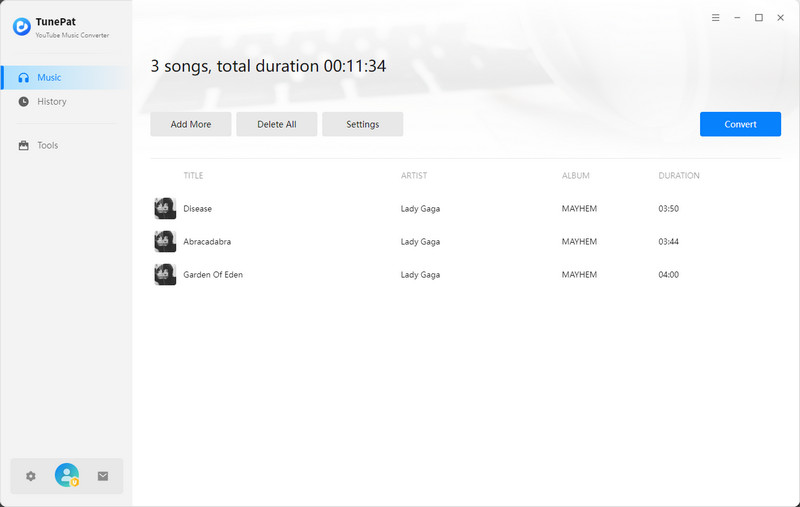
Step 4 Click "Convert" to start converting the selected YouTube Music songs. To add more songs from other albums or playlists for a single conversion, click "Add More".
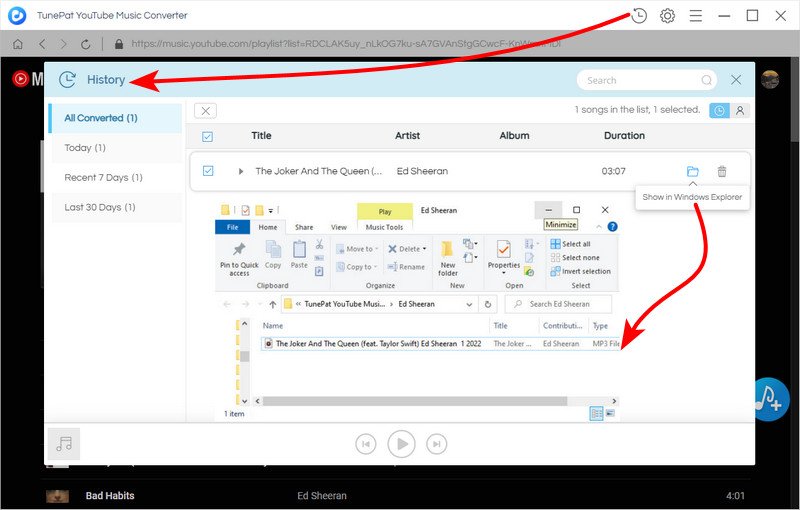
Step 5 After the conversion is complete, locate your downloaded YouTube Music songs by clicking the "History" icon, or open the local folder to manage your files. Now that you have your YouTube Music tracks as MP3 files, you're ready to transfer them to a USB drive for offline listening. Follow the steps below to complete the process.
Part 2. Step-by-Step Guide to Transfer YouTube Music to a USB Flash Drive
After downloading your favorite YouTube Music tracks to MP3 with TunePat YouTube Music Converter, you can easily save YouTube Music to USB for offline listening. Follow the steps below to transfer the songs to your USB flash drive and enjoy them on any device with a USB port.
On a Windows Computer:
Step 1 Connect your USB drive: Plug your USB flash drive into a USB port on your PC.
Step 2 Locate downloaded YouTube Music: Open the folder where your YouTube Music MP3 files are saved.
Step 3 Transfer music to USB: You can either:
- Right-click the songs → select "Send To" → choose your USB drive.
- Drag and drop the selected songs to the USB drive.
- Right-click → "Copy" → open the USB drive → "Paste".
On a Mac Computer:
Step 1 Insert your USB drive into your Mac.
Step 2 Open Finder (Command + Space → type "Finder") and navigate to your downloaded YouTube Music folder. If using TunePat, the output folder usually opens automatically.
Step 3 Select the songs to transfer (hold Command or Shift for multiple selections), then copy them (Right-click → Copy or Command + C).
Step 4 Locate your USB drive in Finder's sidebar under Locations, then paste the songs (Right-click → Paste Item or Command + V).
The transfer progress will appear, and once finished, safely eject your USB drive. Now you can play YouTube Music offline on devices like your smart TV, car, or any other USB-enabled player.
Part 3. FAQs About YouTube Music USB Transfer
Q1: Can I download YouTube Music directly to a USB drive?
A: No. YouTube Music does not offer a built-in feature to download songs directly to a USB drive. To enjoy offline playback, first download YouTube Music in MP3 or other compatible formats using a converter like TunePat YouTube Music Converter, then transfer the files to your USB drive.
Q2: What tools can I use to download YouTube Music to my computer?
A: Several tools allow you to download YouTube Music to your PC or Mac:
- Desktop software: TunePat YouTube Music Converter, 4K Video Downloader, DVDFab YouTube to MP3, Freemake Video Downloader.
- Online YouTube to MP3 sites: CnvMP3, Ezmp3, Loader.to, y2mate.com, YTMP3, SaveFrom.net, OnlyMP3, etc.
- Mobile apps: Snaptube, TubeMate, VidMate, Documents by Readdle.
Q3: How do I transfer the downloaded YouTube Music to a USB drive?
Q4: Which audio format is best for transferring YouTube Music to USB?
A: USB drives usually support MP3, WAV, AAC, FLAC, WMA, and OGG. For maximum compatibility with any device, MP3 is recommended. TunePat YouTube Music Converter can export in MP3, FLAC, WAV, M4A, and more, allowing you to choose the format that suits your USB device.
Q5: Can I recover deleted YouTube Music songs from a USB drive?
A: Yes! If you accidentally delete songs from your USB drive, you can use a data recovery tool like Syncios D-Savior. It supports recovering over 1,000 file types including music, videos, and other media from USB drives.
Conclusion
Now you know how to transfer YouTube Music to USB for easy offline listening. With TunePat YouTube Music Converter, you can download YouTube Music songs, albums, or playlists in formats compatible with any USB-enabled device. Even free YouTube Music users can enjoy their favorite tracks without restrictions. Once your music is on the USB, you can take it anywhere, such as your car, smart TV, or any device with a USB port, and enjoy YouTube Music offline anytime you want. Simple, convenient, and giving you full control over your music collection.


Olivia Anderson
Senior Writer