"I’m trying to make an intro for a video, but I’m unable to add songs from my Apple Music from which I’ve downloaded to my music Library. When trying to add Audio through Apple Music to Adobe Premiere or any other video editing software/application, it’s all grayed out." This is a question posed by a Reddit user. Have you been in the same situation?
We all know that Premiere Pro is an excellent video editing software, and Apple Music also has a large music library. So, it is very natural that we want to import Apple Music to Premiere Pro. However, unfortunately, it is not always so smooth when adding Apple Music to Premiere Pro. Today, this article will introduce in detail how to add Apple Music to Premiere Pro. Please continue reading!

Part 1: Why Can’t I Import Apple Music to Premiere Pro Directly?
First, let's answer the question at the beginning. Why can't we always import Apple Music to Premiere Pro smoothly? This is because the downloaded Apple Music is protected by DRM technology, and Premiere Pro cannot recognize this format. Premiere Pro supports formats such as MP3, WAV, AIFF, etc. Therefore, you cannot import Apple Music to Premiere Pro directly.
Part 2: How to Add Apple Music to Premiere Pro?
To import Apple Music to Premiere Pro, you need to download Apple Music in a format supported by Premiere Pro first.
Part 2.1: Download Apple Music to Your Computer
This article will introduce you to a professional Apple Music downloader, TunePat Apple Music Converter, that allows you to download music in plain formats, like MP3, AAC, WAV, FLAC, AIFF, or ALAC. In addition, you can also download Apple Music podcasts, audiobooks, and iTunes M4P music to your computer. In addition to downloading Apple Music in its original quality, TunePat also supports batch downloads. Even if you have a rich music library, TunePat can quickly complete the download task.

TunePat Apple Music Converter
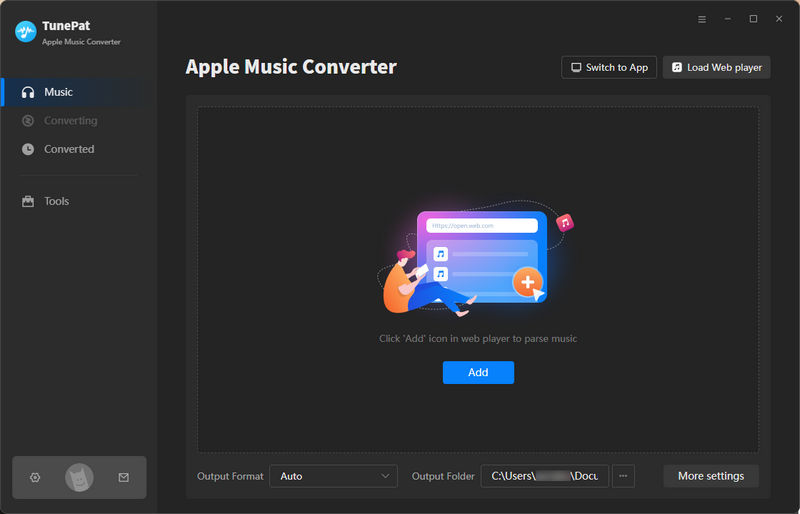
Step 1 First, please download TunePat to your computer. TunePat is available for Windows and Mac computers. When you open the program, you will see the following interface. TunePat allows users to convert songs from two music sources. If you convert from the Apple Music web player, you will enjoy faster conversion speeds, and if you download from the iTunes (Music) app, you will download music with higher sound quality. To switch the audio source, just click the "Apple Music web player" button above.
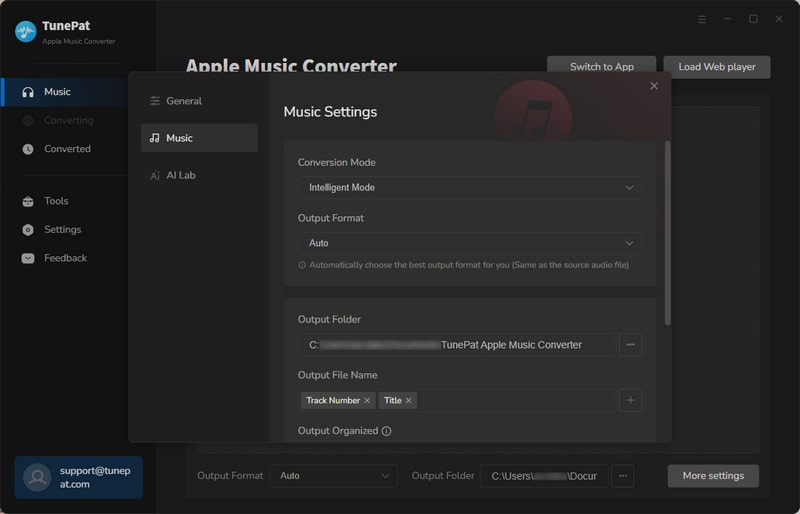
Step 2 Before converting, we recommend clicking the settings button to modify the basic settings. You can modify "Output Format", "Bit Rate", "Sample Rate", "Output Folder", and so on here. You can modify them according to your preferences. But please change the output format to the format supported by Premiere Pro.
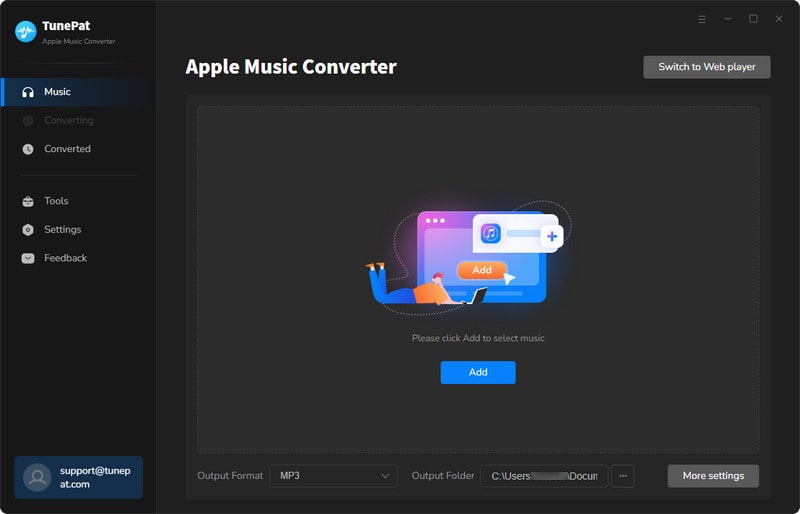
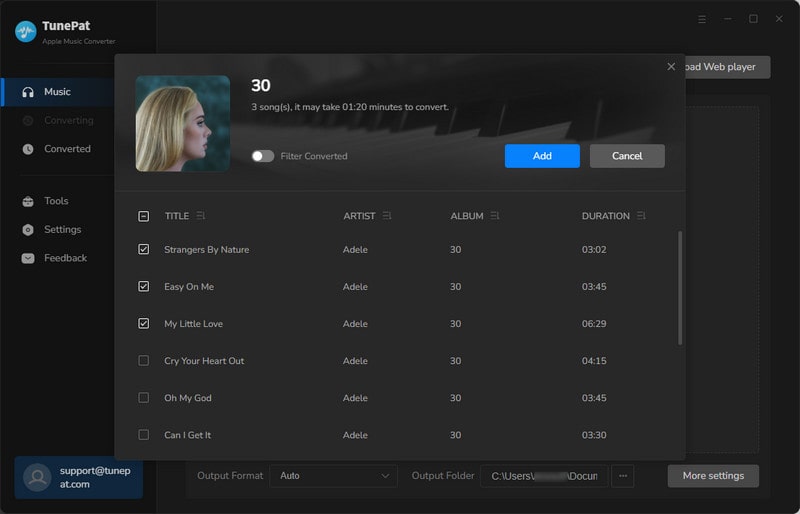
Step 3.1 If you convert Apple Music from the iTunes App, you can click the "Add" in the middle, then please choose the desired songs from the pop-up window. After selecting, please click "OK" to add these songs to TunePat.

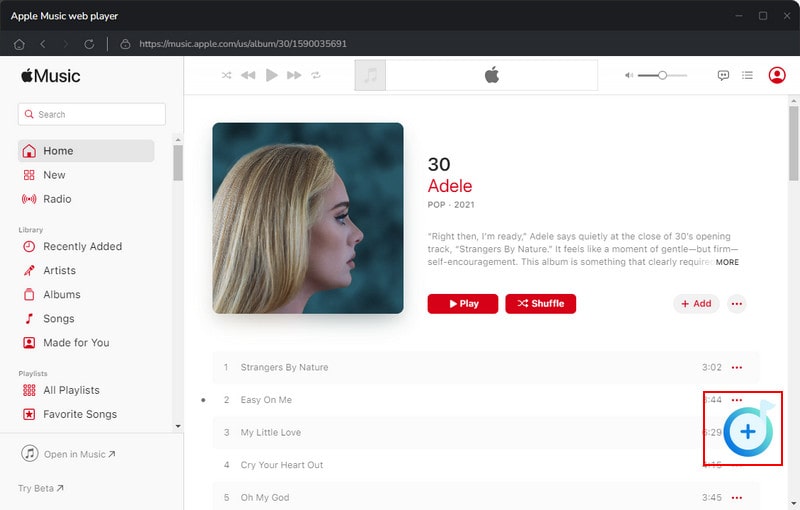
Step 3.2 If you want to convert Apple Music from the web player, you can log in to your Apple Music account and browse the songs, albums, or playlists you wish to download. Then click the blue "Click to add" button in the lower right corner. After clicking, TunePat will load these songs. You can tick off the songs you want and click "Add" to add them to TunePat.
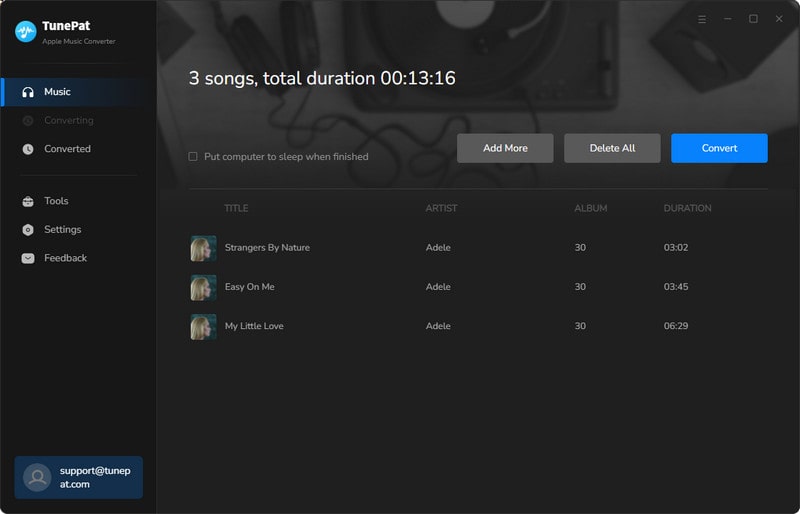
Step 4 You will see some buttons at this point. To convert more songs from different albums at the same time, please click "Add More". Otherwise, you can click the "Convert" button. TunePat will download your songs up to 10 times the speed. After that, you will just need to wait for the conversion to finish.
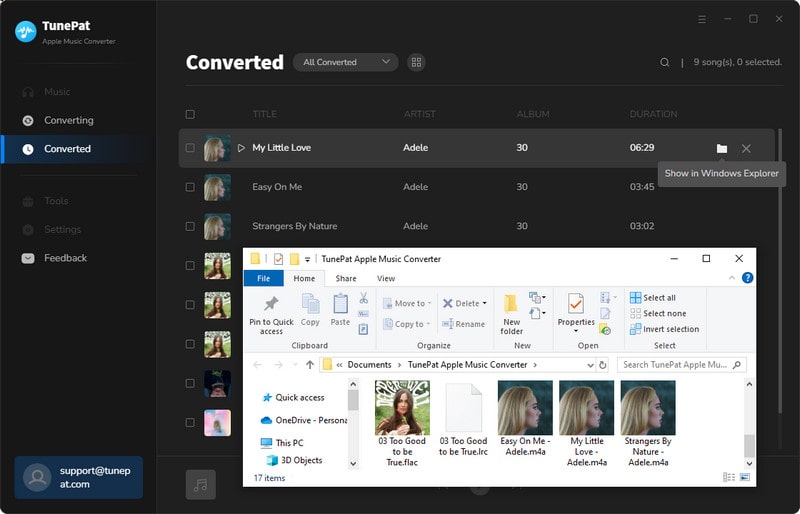
Step 5 Once all the songs have been downloaded, you can go to the "History" tab to view your download history. These downloaded Apple Music songs are decoded, which is different from the music you download directly from Apple Music. You can save the songs permanently and add Apple Music to Premiere Pro now.
Part 2.2: Import Downloaded Apple Music to Premiere Pro
Next, let's see how to import downloaded Apple Music to Premiere Pro.
Step 1 First, open Adobe Premiere Pro on your computer. Then start a new video project or open an existing project.
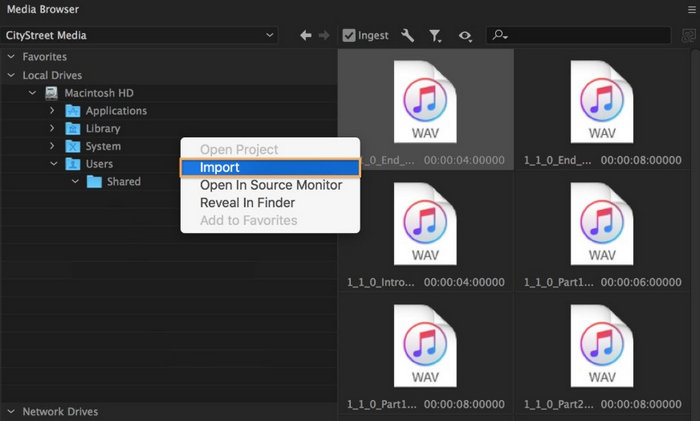
Step 2 Use "Media Browser" to locate the file folder where you downloaded Apple Music, then right-click and select "Import".
Step 3 Select "Window" > "Project" to display the Project panel. The Apple Music audio file you imported will be selected. Double-click it to open it in the "Source" panel. Then, you can drag and drop it onto any audio track below the video track. Now, you have successfully imported Apple Music to Premiere Pro.
FAQs About Adding Apple Music to Premiere Pro
Q1: Can I add Apple Music to Premiere Pro?
A: Yes. But you cannot add Apple Music to Premiere Pro directly. We recommend using TunePat Apple Music Converter to download Apple Music to the formats that are supported by Premiere Pro, and then add it to Premiere Pro.
Q2: How to convert Apple Music to MP3?
A: There are many popular free Apple Music to MP3 converters on the Internet. Click to read to choose the one that suits you best.
Conclusion
In this article, we answer why you can't add Apple Music to Premiere Pro directly. The songs downloaded from Apple Music are protected by DRM technology, so we need to use professional music downloaders like TunePat Apple Music Converter to download Apple Music to a plain format. If you also have such a need, why not download it and give it a try?


Delilah Rene
Senior Writer