Shotcut is a free, open-source video editing software compatible with Windows, macOS, and Linux. It offers a range of video editing features, including support for various formats, timeline editing, and the option to apply video and audio effects. While Shotcut supports importing audio files from local folders, the question arises: does it support importing Tidal music? As you may know, TIDAL currently provides over 100 million HiFi quality songs to the global music community. Using your favorite Tidal music as the background music for your videos can undoubtedly enhance the overall experience.
So, how can we import TIDAL music into Shotcut? If you haven't read today's article, you might think it's a challenging task. This is because, even as a subscriber to TIDAL HiFi or HiFi Plus, you'll find that the temporarily cached files for offline playback cannot be accessed by other programs. Moreover, Tidal's offline mode is different from other streaming services, as it only supports the mobile app. However, don't worry. Today, we will provide a simple and effective solution to help you easily download your favorite TIDAL music locally and then import it into Shotcut for use.
Five Simple Steps to Add TIDAL Songs to Shotcut
If we want to convert TIDAL music to a standard format, we need the assistance of a powerful third-party converter, and TunePat Tidal Media Downloader, with its professional yet clean interface, is the best choice. As a leading converter in the industry, TunePat Tidal Media Downloader allows users to batch download Tidal music, albums, or playlists at speeds of up to 10X while maintaining the highest Hi-Res audio quality. You can choose to output Tidal music in your preferred format, such as MP3, and freely customize ID3 tags to name the output files. This tool also comes with more user-friendly features that you'll find pleasantly surprising. Follow the steps below to explore more:

TunePat Tidal Media Downloader
Step 1Firstly, you need to download and install the appropriate version on your Windows or Mac computer. Please note that the Windows and Mac versions have slight differences. When running the Windows version, there are two sources for exporting TIDAL songs: the App and the Web player. The former can operate at 5X conversion speed, retaining the highest Master (Max) quality. The latter speeds up to 10X and can maintain HiFi (High) quality.
Note: The Mac version defaults to recommending the Web player mode. If you want to change the mode, you can go to the "Settings" module and switch the Convert Option to "Record from App".
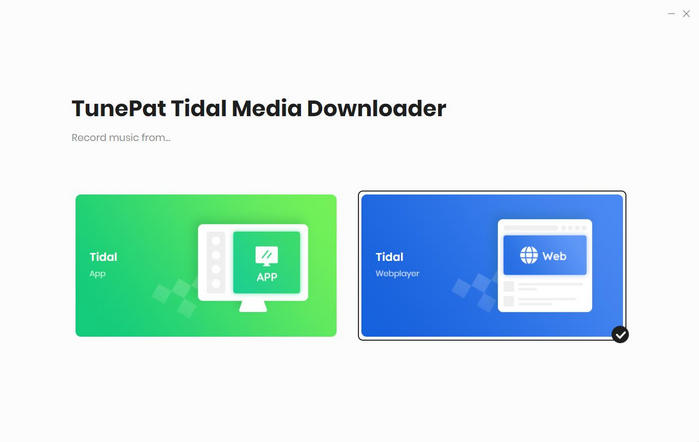
Step 2 After selecting the source for converting music, you can start adding songs. The process of adding songs differs slightly between the two modes. You need to log in to your Tidal Free/HiFi/HiFi Plus account either in the TIDAL app or the embedded web player in TunePat.
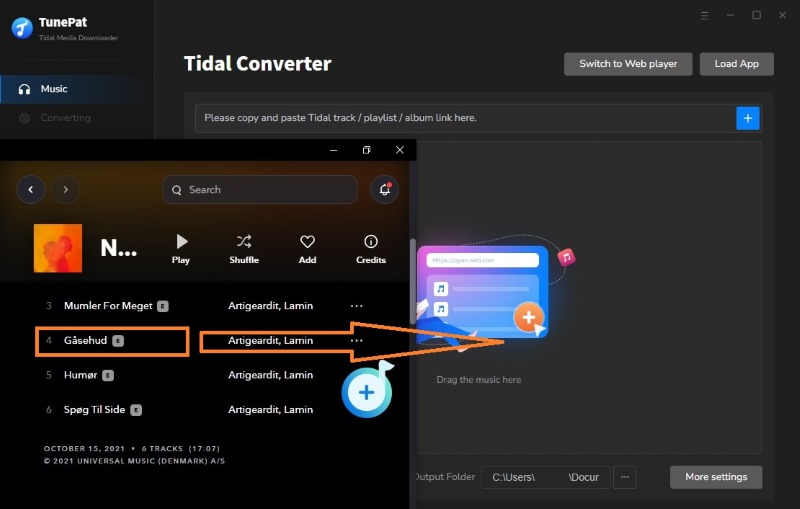
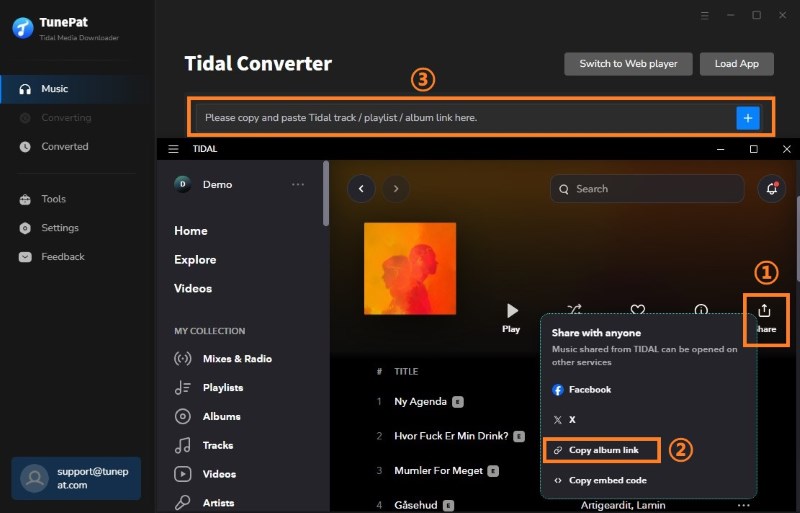
When choosing to get TIDAL music from the App, find your desired songs in the TIDAL app, hold down the cover of the target song, drag it from the TIDAL app to the "Drag the music here" area on the TunePat program, and release it. TunePat will automatically analyze it. Alternatively, you can obtain the corresponding sharing link from the TIDAL app, copy it to the box, and click "+" to start parsing.
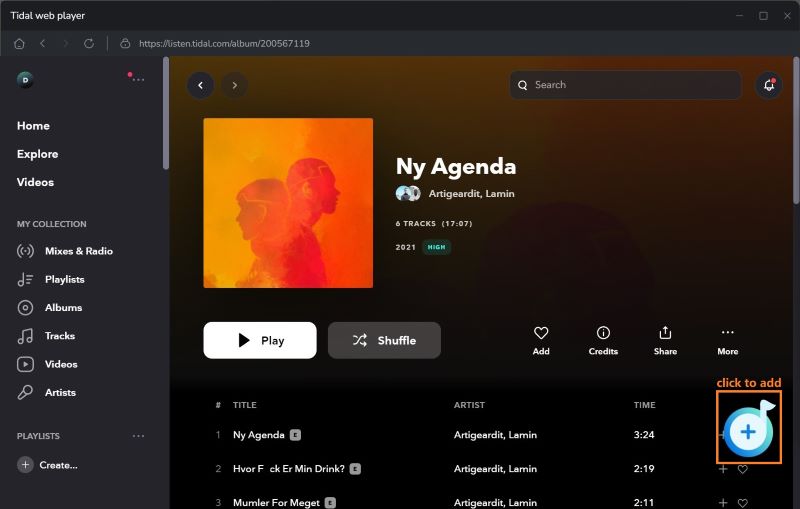
If you choose to convert TIDAL songs from the web player, simply open the target track, and click the "Click to add" button in the lower right, and you're good to go.
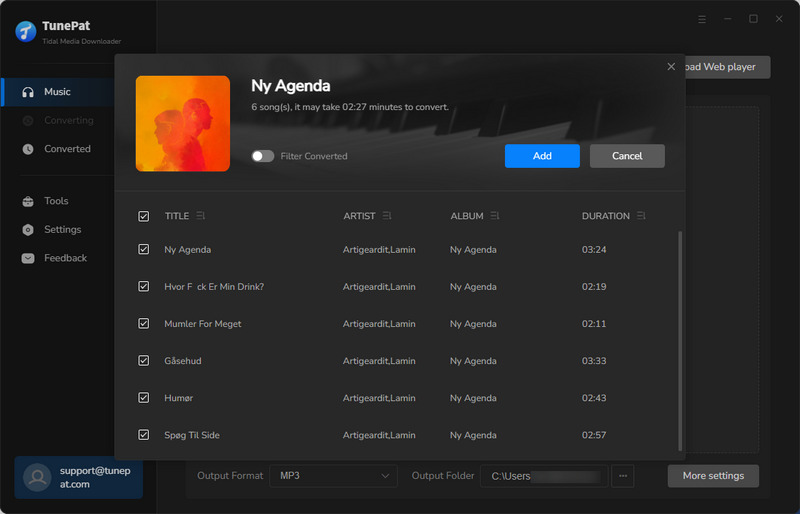
Step 3 After successfully parsing the selected TIDAL content, it will be displayed in a popup window. You can manually remove titles from the list that you don't need to convert. After choosing what to convert, click the "Add" button to add these selected contents to the Home interface.
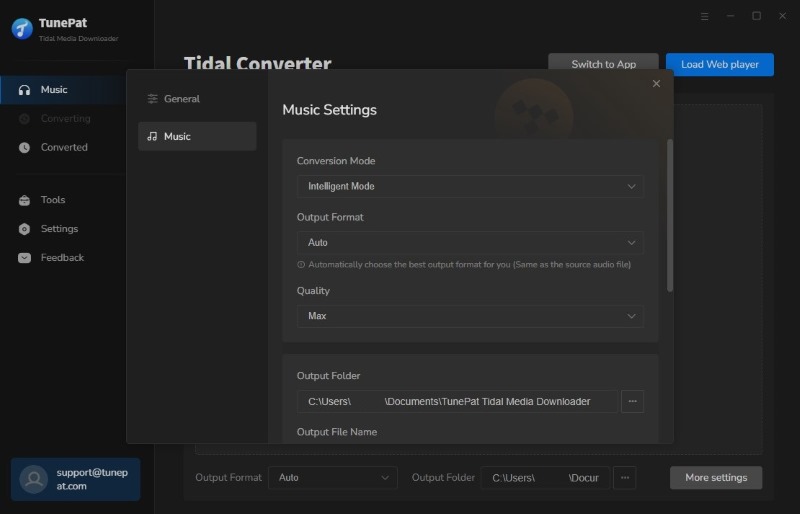
Step 4 Before starting the conversion process, don't forget to customize the output settings. Click the "Settings" button in the bottom left corner to do this. You should know that Shotcut supports some common audio formats, such as MP3, AAC, WAV, FLAC, AIFF, ALAC, Ogg Vorbis, AC3, AMR, etc. Select the output format that Shotcut can support. Then, you can choose other parameters according to your actual needs, such as bit rate, sample rate, output folder, output file name, etc.
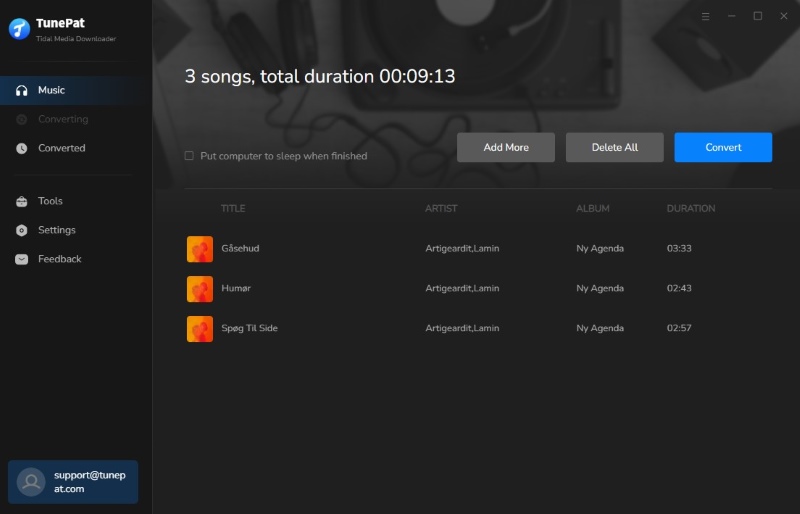
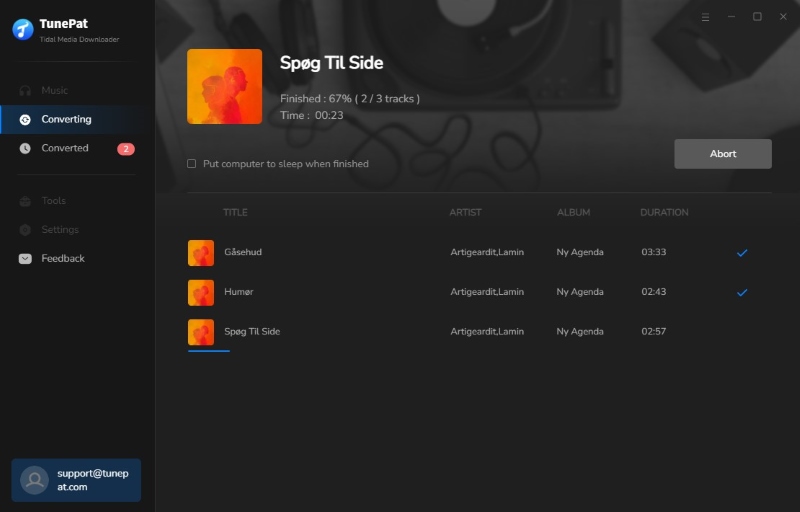
Step 5 After completing the settings, return to the Home interface and click the "Convert" button to start the conversion process immediately. Then, you must be patient and wait until all the songs are converted. After that, the folder containing the converted TIDAL songs will automatically pop up.
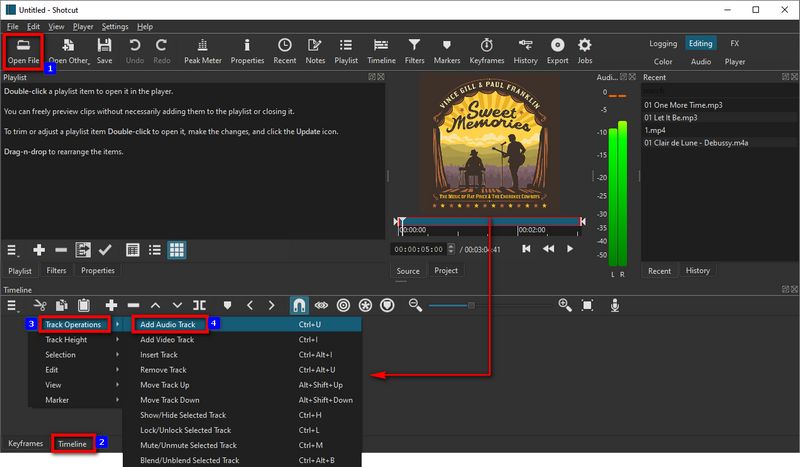
Step 6 Now, you can import the converted TIDAL music into Shotcut videos. You can open the already-created project or create a new one. Click the "Open File" button, select the target track from your local storage, and the track will be added and displayed in ShotCut's Playlist section. Click the "Timeline" tab at the bottom of the program, right-click, and select "Track Operation" > "Add Audio Track". Drag the audio from the playlist to the newly created audio track.
Conclusion
The above information is sufficient for every user who reads this article to learn how to add TIDAL music to Shotcut for use as background music. Regardless of your proficiency in computer technology, we hope you can smoothly apply this technique following the steps outlined above. With the assistance of TunePat Tidal Media Downloader, obtaining your favorite Tidal music is a quick process without the need for any complex instructions. The resulting TIDAL music files can not only be used on Shotcut but also easily edited, moved, transferred, shared, and more. If you haven't downloaded this fantastic tool yet, don't hesitate to click the "Download" button below!




Olivia Anderson
Senior Writer