The music streaming platforms offer convenient access to a vast database of songs, podcasts, music videos, and more. The industry has witnessed a notable shift in the way of listening to music. This flexible and easy-to-use online content mode quickly occupies the market. Tidal is one of the most popular choices among music streaming services. It mainly provides the users with 2 main subscription tiers. One (HiFi) costs about $10 per month to streams music at up to 1411 kbps. Another type (HiFi Plus) allows us to listen to all the tracks at up to MQA (lossy 24-bit/96 kHz), and you should pay around $20 a month.
Maybe someday you want to cancel the Tidal Music subscription and switch to other competitors like Spotify, Deezer, Apple Music, Amazon Music, etc. Or you simply want to end the subscription to save money. You come to the right place. We will guide you on how to cancel the subscription of Tidal with a few clicks. Meanwhile, this tutorial will let you know how to keep enjoying your favorite Tidal playlists even after canceling the subscription.
Part 1: How to Cancel Tidal Music Subscription?
Part 2: How to Keep Tidal Playlists Playable After Canceling the Subscription

→ Cancel your Tidal Subscription With the Mobile App
If you signed up for the Tidal account on the Tidal app using a credit card or PayPal, read these steps
Step 1: Run the Tidal app from your Android or iPhone. Sign in to your account.
Step 2: Click on the My Collection option at the bottom-right of the screen, then find and choose the Settings icon.
Step 3: On this page, select the Edit Profile and then Manage Subscription.
Step 4: Tap on Subscription, followed by the Cancel Subscription option.
→ Cancel your Tidal Subscription Using the Website
Signed up via Tidal on the website instead of an app? You'll need these steps to cancel your Tidal subscription.
Step 1: Signed up via Tidal on the website instead of an app? You'll need these steps to cancel your Tidal subscription.
Step 2: Head to the official Tidal website in your web browser and login if you're not already signed into your account.
Step 3: Click the account icon in the upper left corner and go to Manage Subscription. Click on the Subscription option. Now on the Your Subscription page, cancel your Tidal subscription.
Can’t cancel the subscription through the two methods above? You might subscribe to Tidal via a third-party service. Thus you need to contact their support team to know how to cancel your subscription.
Tidal is a subscription-based music service with a catalog of over 80 million songs, some of which are exclusives. However, these music streaming services have something in common. Although you are a paid user and are allowed to use the offline listening feature of these apps, the downloaded files are temporary for special protection. So what will happen when you stop subscribing to Tidal?
You will lose access to your favorite songs, albums or playlists once your account expires. That’s so annoying, right? We announce a tool called TunePat Tidal Media Downloader to exclude the difficulty and anxiety for you. It’s a professional downloader for grabbing songs from Tidal Premium and Tidal HiFi. You don’t need to install any other apps, including the Tidal desktop app. In this way, you can finish the steps under a secure environment. To meet different needs, it can support converting Tidal Music as MP3, AAC, WAV, FLAC, AIFF or ALAC and the conversion can be completed at a fairly quick pace.
Key Features of TunePat Tidal Media Downloader

TunePat Tidal Media Downloader
Within the validity period of the Tidal account, let’s use the powerful tool to get wanted songs from Tidal onto the computer.
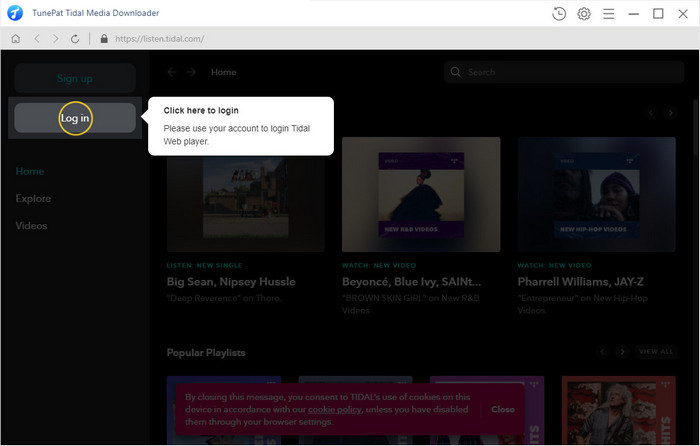
Step 1Sign Into Your Tidal Account
Tapping the Open Tidal Web Player button to enter the following page. As you can see, you should log into your Tidal account as the on-screen tips.
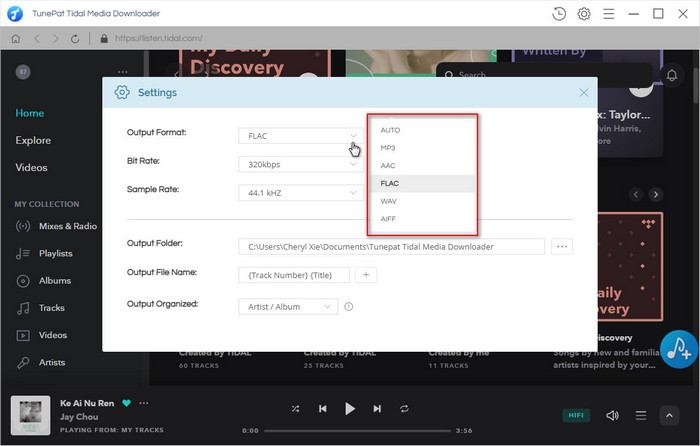
Step 2Change the Output Settings
After a successful login, you can visit the vast music library of Tidal. But before choosing a song to convert, you are supposed to set up the output settings on the Settings window. The supported format includes MP3, WAV, FLAC, and more. Here we will choose to export MP3 files. And you can create and then select a save path by yourself to save these downloaded items. By the way, someone probably wish to get HiFi sound quality of the songs, then you should select the Auto mode.
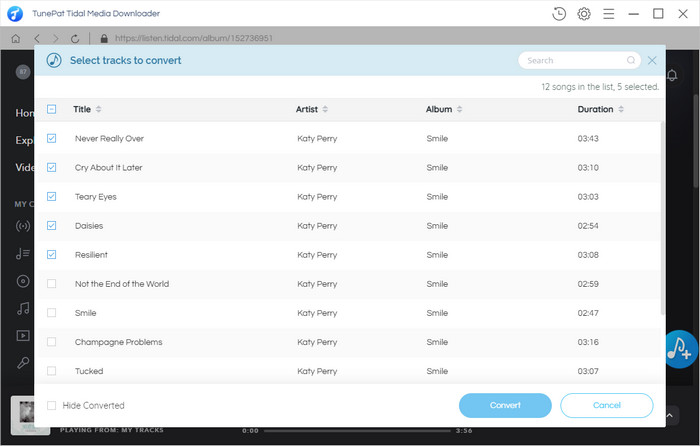
Step 3Select Wanted Songs to Convert to MP3
Open a song, playlist, album or artist and you will see a + button. Click on it and the converter will automatically load and list the songs. Check the items you want and choose the Convert option to start.
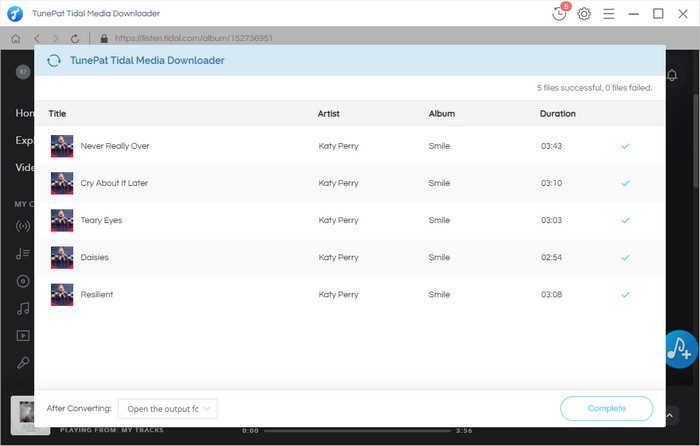
Step 4Converting Tidal Music
Please ensure a good network environment and patiently wait till the conversion is completed. You can view the converted items on the History module. If needed, double-click to play the songs within the Tidal Music Converter.
You are now getting what you want from the Tidal Music web player through all the steps above. The songs can be saved forever on your computer, mobile phones, game players, MP3 players, USB drive, and other places. In this way, you can free yourself from the annoyance of losing songs after canceling the Tidal subscription. Don't hesitate to become a member of us, and you will have a better user experience!
What You Will Need
New Release


Hot Tutorials