

TunePat Tidal Media Downloader
We recently saw some users leave a message asking how to save his Tidal playlist to a computer in WAV format. Obviously, just downloading Tidal songs offline to a mobile device won't satisfy everyone's needs. Of course, when it comes to today's hot streaming music platform, you have to admit that Tidal has earned its place with its high-fidelity sound quality. Maybe you can turn to other platforms, such as Spotify, to be able to listen to songs offline on your computer. But this doesn't completely solve the problem. Virtually all streaming music platforms have a joint "flaw": their playlists are only accessible on select devices through their official mobile or desktop apps.
So, do you want to burn Tidal music to CD? Would you like to mix Tidal music on DJ software? Want to save Tidal playlists on an external hard drive to save space on your phone or computer? Then you have come to the right place. This article will introduce to you how to use a professional Tidal to WAV converter to help you convert Tidal Music to WAV format. Just a few simple steps! Let's start.
Part 1: What is WAV Format?
Part 2: WAV vs. MP3
WAV is short for Waveform Audio File Format, developed jointly by Microsoft and IBM as an audio file standard for storing digital audio in 1991 on PC. Its file extension is .wav or .wave. WAV is an uncompressed format, so it's usually not suitable for the early days of the internet. But the uncompressed WAVs are useful for professionals who require the best sound playback quality.
You should distinguish that uncompressed formats are different from the lossless compressed formats, like FLAC. The latter are compressed, but no information is lost. By contrast, WAV files own a huge file size.
I think you must be very familiar with the MP3 format, which is a very versatile audio format. But because MP3 uses lossy compression, some data will be irreversibly lost when encoding the MP3 file. File size and transfer efficiency are the strengths of this format. But there are also complaints about the quality of MP3 files, which means the audio files have a low bitrate. The bit rate of MP3 files is usually between 90 kbps and 320 kbps.
However, whether you want to choose MP3 or WAV format still depends on the purpose and application of the audio file. The WAV format is excellent when working with audio or recording podcasts and voiceovers. Of course, if you want lossless sound quality but don't have enough storage space on your device, you can consider using a lossless compression format like FLAC. If you just want to download and share with other relatives and friends, it is better to choose the MP3 format.
Next, we will introduce you to the best Tidal to WAV converter - TunePat Tidal Media Downloader. With it, you don't need to worry about losing sound quality during the acquisition and conversion of Tidal songs. This tool can help you download and convert music from Tidal with lossless audio quality. Support for various output formats, including MP3, WAV, AAC, FLAC, etc., to meet the needs of different users.
Then you can enjoy Tidal songs anytime, anywhere. The converted songs maintain not only the Hi-Fi sound quality but also some ID3 tags, such as title, artist, album, etc., can be preserved. This converter provides a variety of output settings to choose from to manage your local music files more conveniently.
Except for flexible output settings, this intelligent tool also supports batch conversion of playlists. At the same time, ensure that the conversion progress can be carried out quickly. In this way, you can save a lot of effort and time. After conversion, these WAV files can be freely transferred to any other device or player for offline playback.
Key Features of TunePat Tidal Media Downloader
TunePat Tidal Media Downloader
Step 1 After opening the built-in Tidal Music Web Player, you will be guided to sign in with your Tidal account. Fill the blanks with your account information and then you can get access to the Tidal Music library smoothly.

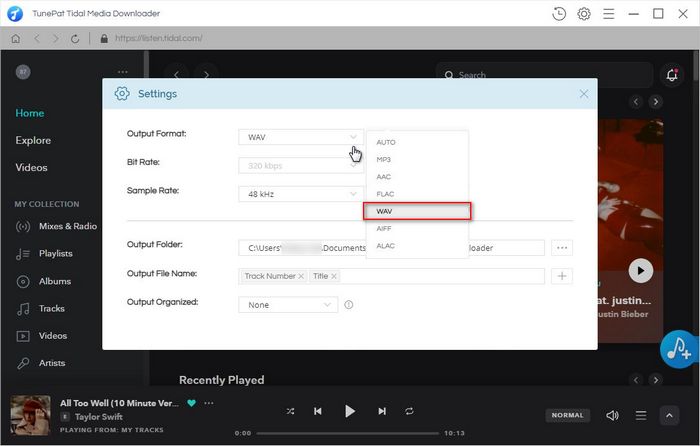
Step 2 The second step you should do is to click the Settings icon in the toolbar in the upper right corner. Then you will see a pop-up. In the output format line, please select WAV. In addition, you can customize other parameters, such as output quality, output folder, output file name, etc. Simply close the window after making your selections to apply the changes.
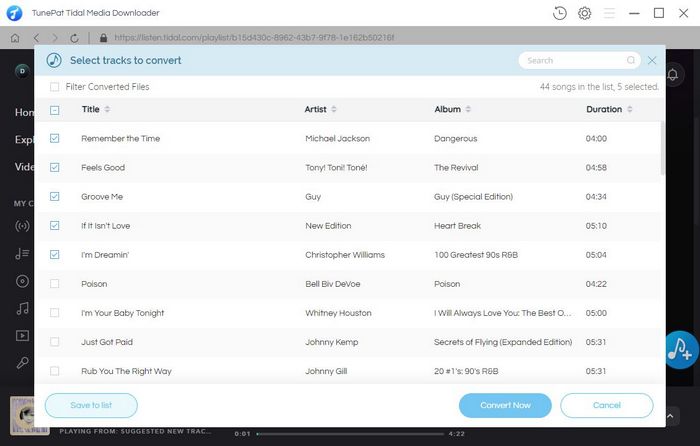
Step 3 Locate a song, playlist, or album you need, then open it. Click on the blue Add to list button to detect and list the songs on a pop-up. On the Select tracks to convert list, you can unselect the songs you don't like. Then tap Convert Now to download WAV files from the Tidal Music web player.
If needed, click on the Save to list button instead. Then back to the last page to continue selecting songs from other playlists or albums. Repeat the steps above. You can then convert all these songs at once on the task list window. After that, tap on the Convert to launch the conversion process.
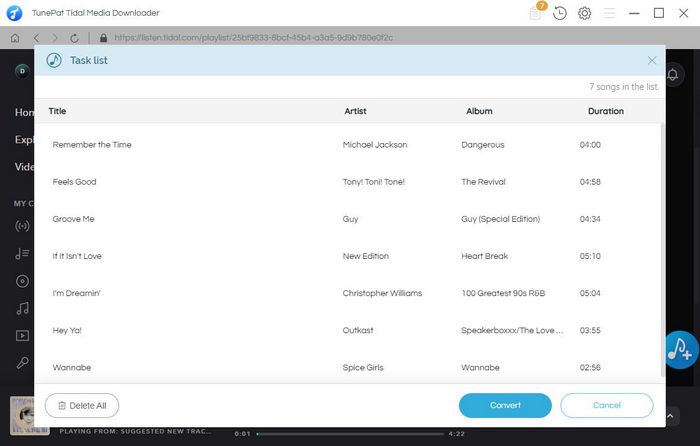
Step 4 To check and play the converted Tidal music files, you can hit the History button. Then you can double-click on the song you want and play it within TunePat, and also, you can transfer, import, or stream the converted WAV files to any other device you want.
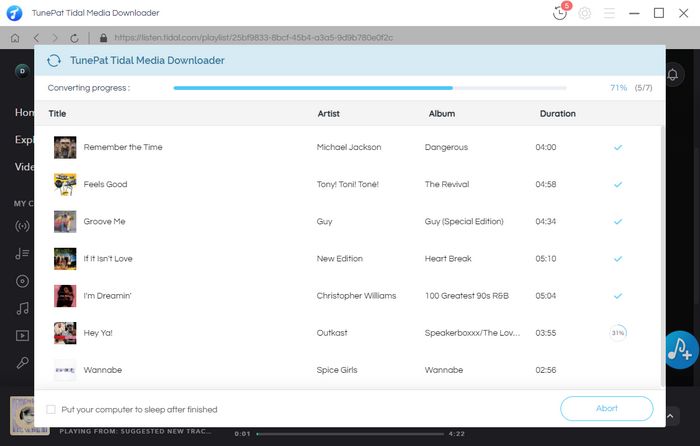
As you can see, downloading and saving Tidal music in WAV format is not difficult. Choosing an excellent Tidal Media Downloader can help you do the task efficiently. The Tidal Music app will no longer restrict the converted Tidal songs. For playback, you can stream it to any WAV-enabled device, software, etc. You can also set these songs as your phone's alarm clock or ringtone if necessary.
What You Will Need
New Release
Hot Tutorials