YouTube Music is a music streaming platform where users can access the latest albums, songs, and popular tracks. YouTube Music provides an extensive library of official and unofficial music videos, giving you a more comprehensive search result when searching for related music tracks.
Like Spotify Free and Spotify Premium, YouTube Music and YouTube Music Premium are essentially the same. It is an ad-free version of YouTube Music. You can get this ad-free version with support for $9.99 a month. Before that, you can also unlock other features in sync, like playing music in the background, downloading and listening to songs offline, and more. And in fact, downloaded songs to Android phones can choose to save to internal storage or SD card. This is also the subject of our article today. Let's take a look at how to save YouTube Music to an SD card.

Method 1: Directly Download YouTube Music to an SD Card
Method one is only available for YouTube Music Premium subscribers. After reading this section, you will know how to set the default to save downloads to the SD card and download the desired YouTube Music songs, artists, albums, and playlists.
Step 1 First of all, run YouTube Music app from your Android phone. And then tap on your profile photo, which is at the top-right corner of the screen.
Step 2 Click on the Settings button with the same shape as a gear. Choose Downloads from the list.
Step 3 Next, slide the Use SD Card switch to the on position.
Step 4 Now browse the YouTube Music app and find out the songs you want to download.
Step 5 Select the 3-dot icon and choose Download from there. And the selected song, album, or playlist will start downloading. When the whole process ends, the download button will turn blue.
Note: If you choose to save the downloads to the SD card, the downloaded music will be saved onto the phone's internal memory by default. What's more, you can't move the songs that have been saved into internal storage directly to an SD card. To put this music on the card, you need to delete all of them and then download them again.
Method 2: Convert YouTube Music to MP3 and Move to an SD Card
You can see that downloading music from YouTube Music to your SD card is a breeze. However, you need to know that if you are not a premium member, you will not be able to do this with the method above. And if your membership is about to expire and you don't plan to renew, the songs you downloaded to the SD card using the above method will also "disappear".
Why? Simply put, when your subscription expires, your account will automatically become a free, ad-supported version. However, downloads require a subscription to maintain their "liveness". At this point, your download will be "interrupted", and the downloaded songs will be inaccessible. The only solution is to delete the download, re-subscribe, and download again.
Don't worry, next we will introduce a method to solve all the above problems, which is for paid users and free users. You just need the help of TunePat YouTube Music Converter. It is a simple yet effective tool for downloading songs from YouTube Music and saving them as MP3, AAC, FLAC, WAV, AIFF, or ALAC format. The audio you get is no longer a temporary file. The original audio quality and the ID3 tags will be kept with the advanced encoding technology. Once you get the converted YouTube Music songs in a common format, you can transfer them to an SD card, USB drive, Apple Watch, etc.

TunePat YouTube Music Converter
Part 1: How to Convert YouTube Music to MP3 Format?
Suppose you don't already have the TunePat YouTube Music Converter program on your computer. Please click the button above to download first. Then install and start the program.
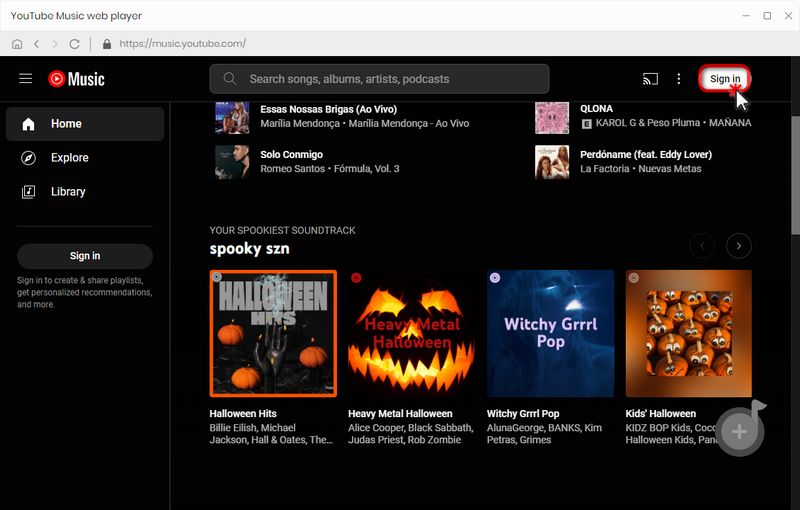
Step 1 After startup, the embedded YouTube Music web player window pops up. Sign in to your YouTune Music account here. After logging in successfully, you can browse the YouTube Music library.
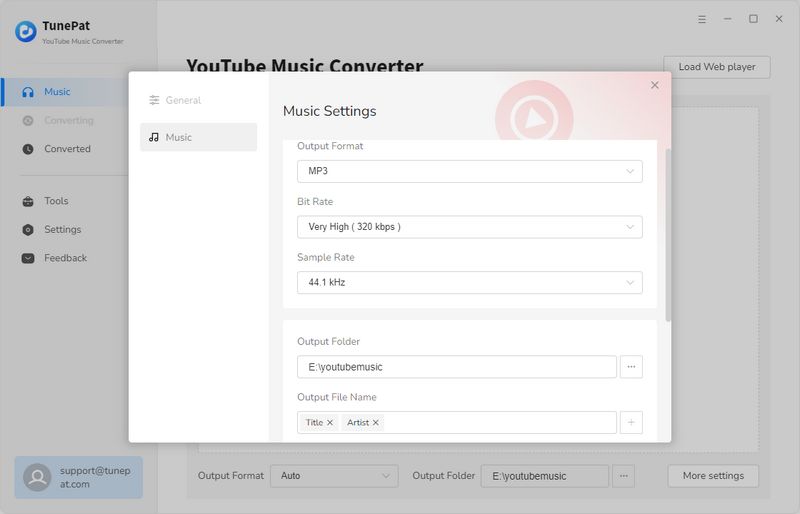
Step 2 Next, there is a crucial step to complete. That is to click the "Settings" button on the menu bar. Enter the Setting window and complete the customization of output parameters. You can choose the output format, sound quality, output path, etc. you want according to your needs. You can name or sort the output songs according to your listening habits, and then you can manage the songs in the local folder more clearly.
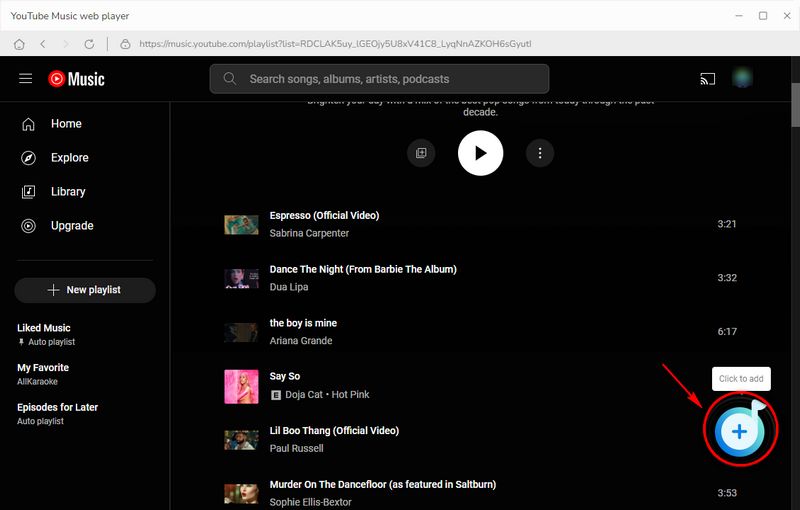
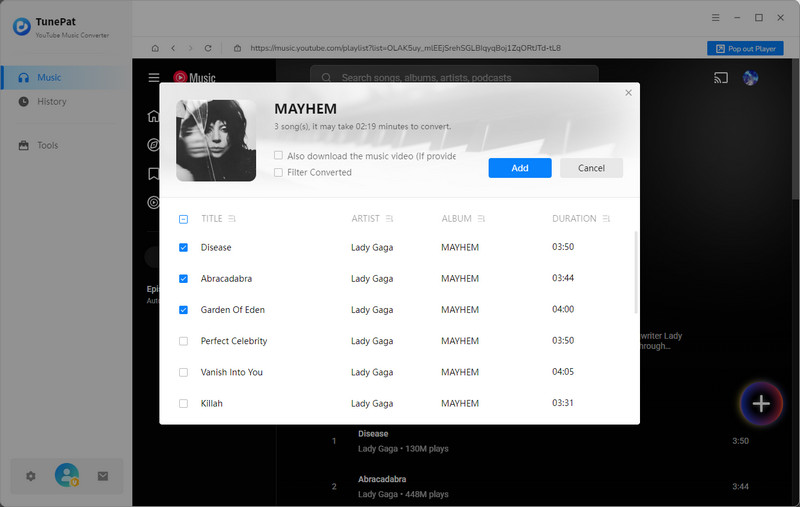
Step 3 After completing the settings, you can find and open the song, playlist, or album you want to convert. Then the "+" button on the right will change from grey to blue and selectable. Click this button to load the song you want to convert. Tick off the songs you wish to convert one by one and then click "Add".
Step 4 Click the "Convert" option to download these YouTube Music tracks for offline listening.
Tips: If you want to continue selecting other songs, click the Add More button. After choosing all songs, back to the Home module and click Convert to perform a one-time conversion.
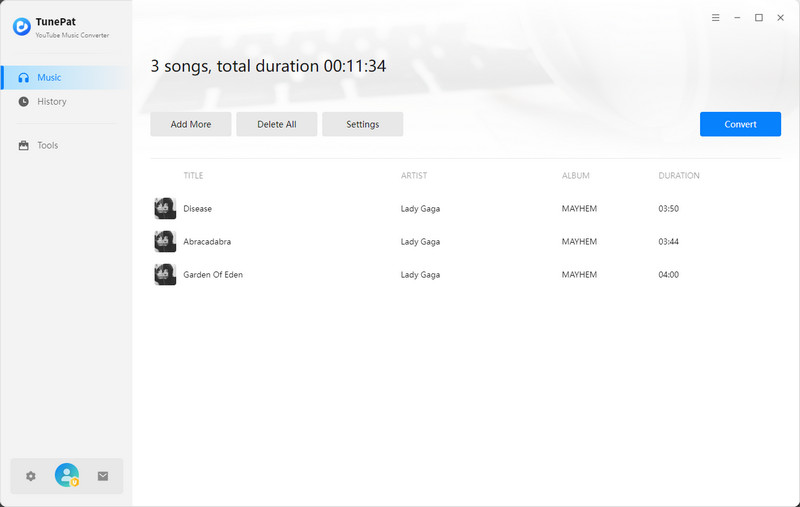
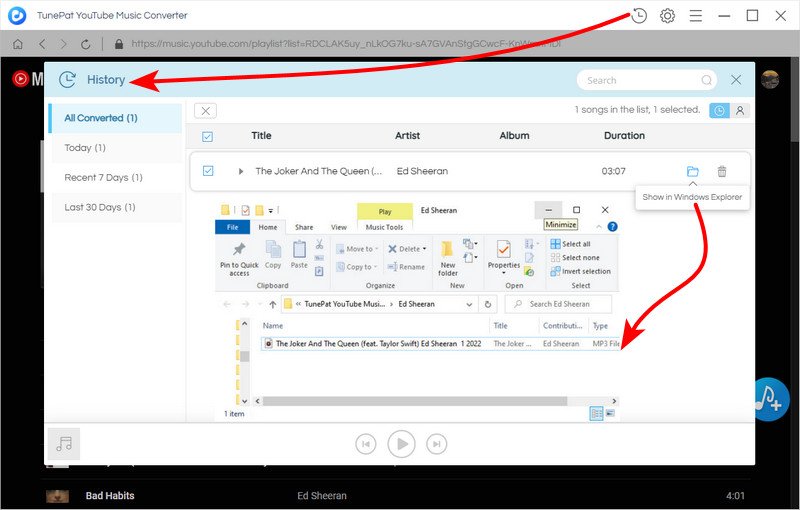
Step 5 If there are not many songs you want to convert, and the network is unblocked, you only need to wait for a while, and you can go to the "History" module to view all the converted songs.
Part 2: How to Import YouTube Music from Computer to SD Card?
Step 1 Insert your SD card into the SD slot on your computer. Memory card slots are generally located on the front or side of your computer. If your computer does not have a memory card slot, you need to connect an SD card reader to your computer and plug the SD card into the card slot on the reader.
Step 2 Now click the computer tab in the start menu and choose the SD card from the list of drives. Here you will find a folder which you can drag your music into.
Step 3 Go to the folder you just set up in Part 1, Step 2, where you keep your music. Directly click and drag the mouse across the music files to select and move them. Or you can choose Copy from the menu and choose the Paste option on the target folder. Then the music will then be migrated into your SD card. Wait until the process is complete.

Quickly Recover Lost Data from Your SD Card
Syncios D-Savior is the best data recovery expert for lost files, which can recover everything from deleted files (from computers, hard drives, USB flash drives, SD cards, SSDs, cameras, etc.) to damaged documents in more than 1,000 file types. Learn More >>
Conclusion
After reading this, you should already know how to save YouTube Music to an SD card. For paid users, it's a straightforward matter. Just change the save path of the Download on the YouTube Music app. But a more versatile and safe way is to use TunePat YouTube Music Converter to download your favorite songs as local files and then transfer and share them later. We provide a free trial version for our users, come and try it!


Delilah Rene
Senior Writer