Adobe Premiere Pro is a video editing software application developed by Adobe. As the industry-leading video editing software, Premiere Pro is comprehensive and can be used to edit videos, commercials, and other movies, TV, online video, and audio. Today it has also become the choice of many amateurs and even professional filmmakers. The program can be used on macOS or Windows computers.
But as you know, all video, audio, and image files to be used in the project must be compatible with Premiere Pro. Premiere Pro allows you to import a variety of audio and video for editing. For example, Premiere Pro supports AAC, AIFF, M4A, MP3, and WAV format audio files. Unfortunately, due to DRM protection, the specially protected format of Amazon Music songs is not recognized by Adobe Premiere Pro. Even though you've become their premium user with a paid subscription, unlocking more permissions, these songs are still limited to the Amazon Music app. So, if you want to add Amazon Music to the video you're editing in Premiere Pro, you need to convert Amazon Music into a format that can be supported by Premiere Pro first. That's what we're going to cover today.

Exporting special formats of Amazon music to your local computer in normal audio format is a very important step. And with the help of the professional and magical TunePat Amazon Music Converter, the conversion process will be very fast (supporting tenfold speed conversion) and easy. This tool is specially developed by TunePat for Amazon Music users and can support Amazon Music Prime or Unlimited accounts. This tool can convert your favorite Amazon music albums, playlists, or podcasts to MP3, AAC, WAV, FLAC, AIFF, or ALAC.
The converted Amazon Music has changed from being only recognized and used by the Amazon Music app to being supported by a variety of different media players, devices, software, etc. Not only that, but you can play Amazon Music offline on multiple devices at the same time without any restrictions. You no longer need to fear a series of troublesome things caused by Amazon Music account expiration or Amazon Music app bugs.
Below is a detailed tutorial on how to convert Amazon Music to MP3 format and import Premiere Pro using TunePat Amazon Music Converter for Windows. The steps for Mac users are similar. Before you start, please download this useful tool on your computer. Please follow us when the download is complete!
Key Features of TunePat Amazon Music Converter
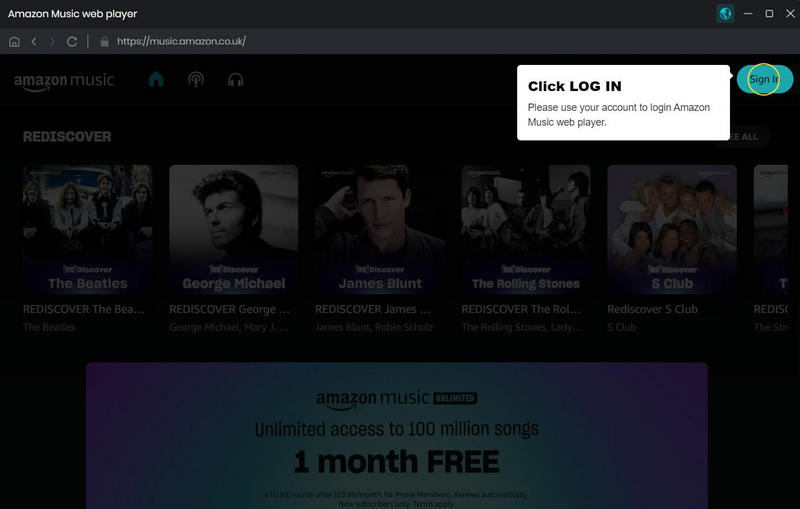
Step 1 Log in to Your Amazon Music Account
After launching TunePat Amazon Music Converter, click the "Open Amazon Music Web Player" button in the center. Then please follow the prompts that light up on the screen, click the "Sign In" option to jump to the login interface to complete the login of the Amazon Music account. After completion, you can access the Amazon Music library as if you were accessing it through a browser.
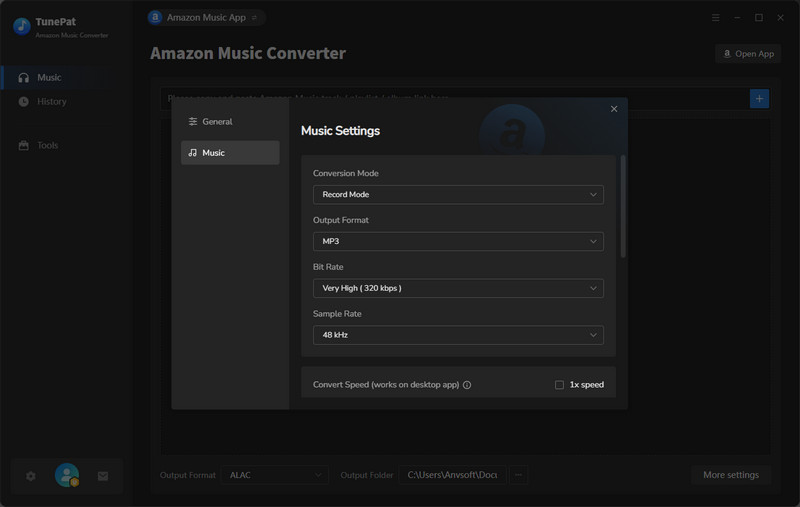
Step 2 Set the Output Format & Other Parameters of Amazon Music
Before selecting a song for conversion, please go to the "Settings" panel to complete the output settings. Here, you can customize the options including output format, output sound quality, output path, output filename, etc. After each option is set up, close the window and the TunePat program will automatically apply the changes and take effect immediately.
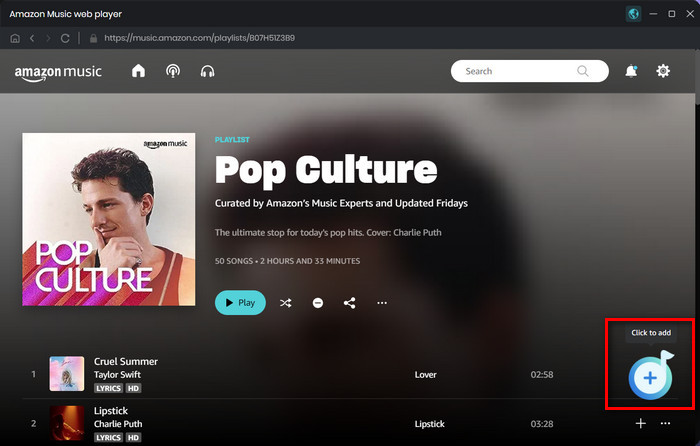
Step 3 Add Target Amazon Music to TunePat
Please directly open or search and find the Amazon Music, Album, Playlist, or Podcast you want to convert. Click the cover to open the item and click the "+" button in the lower right corner. This move will make TunePat automatically recognize all songs on the current page and display them in the pop-up window. Please select the titles you want to convert and select "Convert".
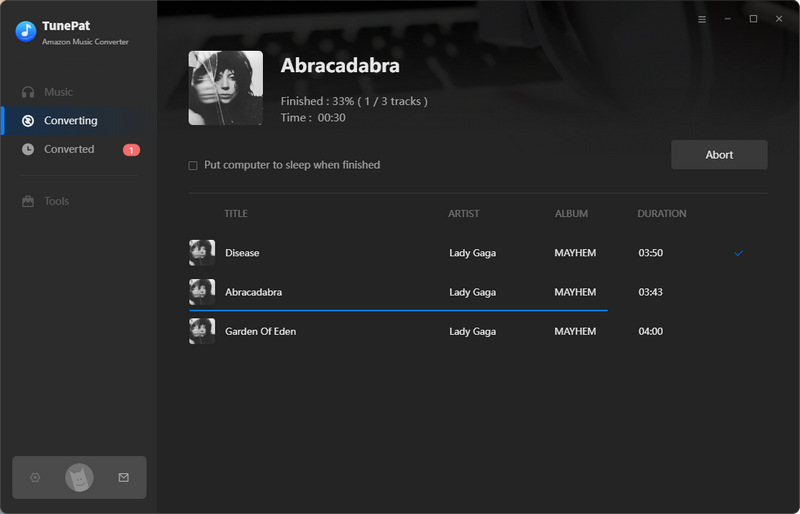
Step 4 Browse Successfully-Converted Amazon Music Songs
After the conversion is complete, you can find and play the songs you just converted directly in the "History" module. Likewise, these songs are also saved to the output folder of your choice. These files can be added to other software, transferred to other devices, uploaded to Cloud service, or shared with friends and family anytime, anywhere according to your needs.
Step 5 Add the Amazon Music MP3s to Premiere Pro
Next, you can add Amazon Music to Premiere Pro. Open Premiere Pro first.
Open the Audio workspace. Start in the Audio workspace by selecting "Audio" at the top of the screen or clicking "Window > Workspaces > Audio". And the "Media Browser" panel will then appear when you select "Window > Media Browser". Find the location where you saved the converted Amazon Music files in the Media Browser, and click "Import" to add the music to the Project panel.
To access the Project panel, select "Window > Project". The audio file you just imported can be found here. Drag the audio clip to the sequence in the Timeline panel after double-clicking the item to open it in the "Source" panel.
Congratulations! You successfully solved the problem of not being able to import Amazon Music to Premiere Pro! TunePat Amazon Music Converter deserves to be called a good assistant. With the help of this tool, your video-making music has a richer source. There are also more diverse uses for your Amazon Music. Hurry up and click the button below to get one right away!
What You Will Need
New Release


Hot Tutorials