Instagram, owned by Facebook, is a photo and video-sharing social networking service which allows users to upload photos and videos, editing with various filters, and organized with tags and location information. It gained popularity rapidly after its launch in 2010, with one million registered users in two months, 10 million in a year, and more than 1 billion monthly active users by now.
Instagram Stories is a feature that Instagram launched in August 2016 which lets users post photos and videos that vanish after 24 hours, similar to Snapchat. And to make the post more interesting, a lot of users are wondering whether they can add music to Instagram Stories. Thanks to Instagram Story Music Sticker, a new feature that Instagram released in June 2018, users in some countries, including the US, the UK, Australia, France, Germany, New Zealand, and Sweden, are able to add music to Instagram post now.
If you’re in a country that doesn’t support the feature, not to worry! In this article, we are going to introduce two ways to add music to Instagram Stories. The first section is to use the music sticker feature and the next section is to apply a well-known music tool that can be used all over the world. Now let’s find out more details:
Part 1. Add Music to Instagram Stories with Music Sticker
Step 1 Download the latest version of the Instagram app on iOS or Android. Go to Instagram Stories, take a photo or video, and then tap the "Stickers" button at the top of the screen. You’ll see the new music option appear alongside your other sticker options.
Step 2 Tap the music sticker icon to open the Instagram music library, where you’ll find thousands of songs to choose from. You can either search for a specific song, browse by mood, genre or what’s popular. And you can tap the play button to hear a preview before adding it to your story too.
Step 3 Choose the exact part of the music that fits your story. Now you’re ready to post to Instagram Stories as usual — add GIFs, polls, hashtags or anything else you might like to add, tap the "Your Story" button at the bottom of your screen, and you’re all set!
Instagram Stories Music Sticker is indeed a useful function to be used, though the choice for music selection is limited and the service is unavailable in some countries. And in the next part, we are going to show you a more powerful way, which may meet all your needs.
Part 2. Add Music to Instagram Stories through Third-Party Apps
Spotify is the King in the music streaming world, which is well-known for its vast music library. It would be perfect if we are able to add songs from Spotify to Instagram Stories. In this part, we are going to show you how to download songs from Spotify with high audio quality to your computer and then integrate the music to your Instagram Stories step by step.
As all the songs on Spotify are in an encoded format, to get songs downloaded from Spotify, we’ll have to turn to a music tool. Here we recommend the most popular Spotify downloader – TunePat Spotify Converter.
TunePat Spotify Converter is a professional music tool specially designed for helping Spotify users to enjoy Spotify songs more freely. With no need to install the Spotify app, it can save songs, albums and playlists from Spotify as MP3, AAC, WAV, FLAC, AIFF or ALAC files at 10X fast conversion speed with lossless output audio quality while keeping the ID3 tags.
TunePat Spotify Converter
TunePat Spotify Converter is available for both Windows and Mac versions. Here we take the Windows version as an example. If you are a Mac user, please refer to this article for more details.
Step 1 First, choose a conversion mode. The App mode requires the Spotify app to be installed on your computer, while the Webplayer mode operates directly on the embedded web player. If you are using a Mac computer, it is recommended that you choose the Webplayer entrance. Please choose the one that suits you.

Step 2 After the selection is made, select the song. Please log in to your Spotify account on the Spotify app or the embedded web player depending on the mode. Find the target Spotify music from the Spotify app, drag it to TunePat, or copy and paste its sharing link for analysis. If it is in Webplayer mode, open the Spotify music you want to convert after logging in, and then click "Click to add" to start recognition.
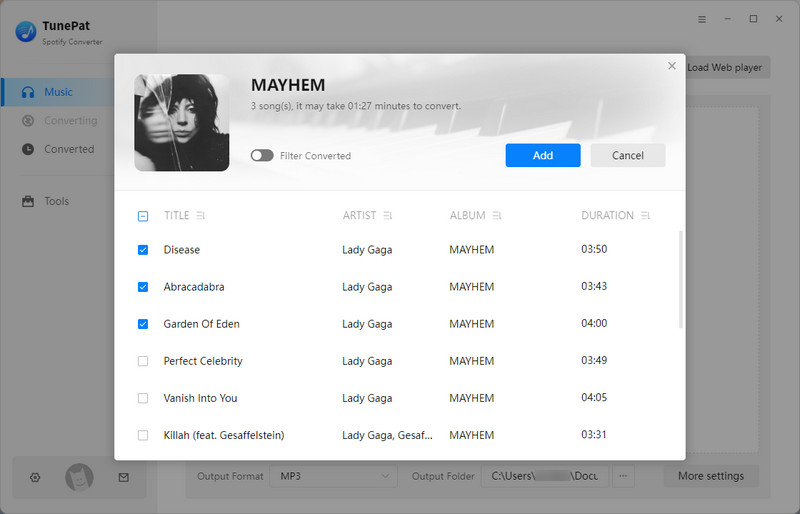
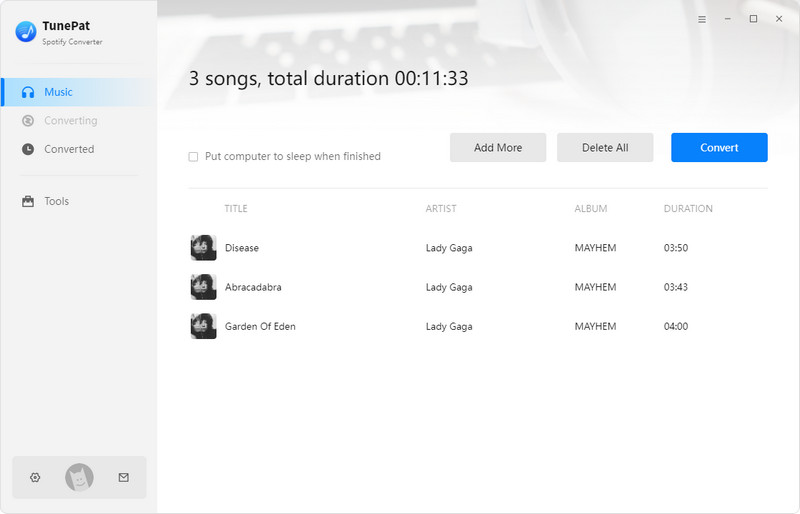
After recognition, the track will be displayed in the following pop-up window. Clicking the "Add" button causes these titles to be added to the Home page for conversion.
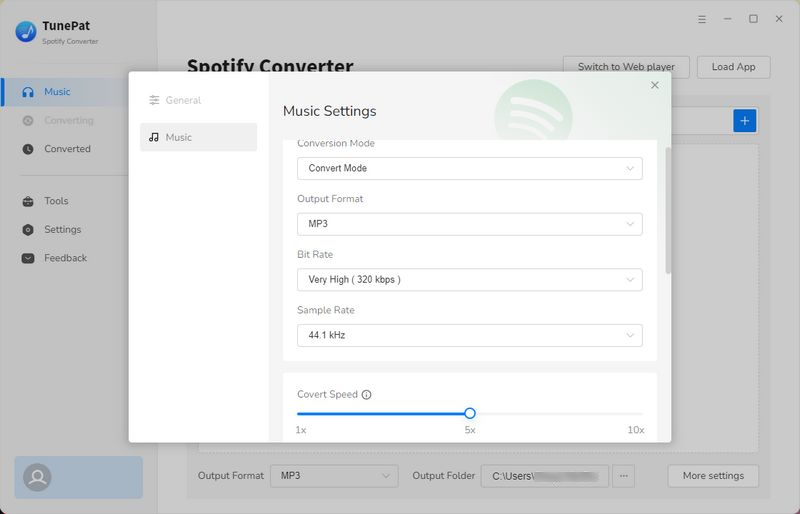
Step 3 Before downloading music, please check the default output settings first. Click the "Settings" button in the lower left corner to complete the setting of output parameters, such as output format, output sound quality, etc. The output format is recommended to choose the most widely used MP3. If you have specific requirements for the output format, please confirm in advance whether the format is supported by the software you will use later to edit the video.
Note: Many Apps support editing videos and uploading them to Instagram. Please go to their official website to learn about the supported audio formats. We briefly list a few commonly used ones below:
1. InShot --- MP3, WAV, M4A, AAC
2. iMovie --- MP3, WAV, M4A, AIFF, AAC
3. Premiere Rush --- WAV, MP3, M4A
Step 4 Go back to the Home page and click "Convert" to start the conversion. After conversion, you can browse Spotify music in the Converted module or local folder.
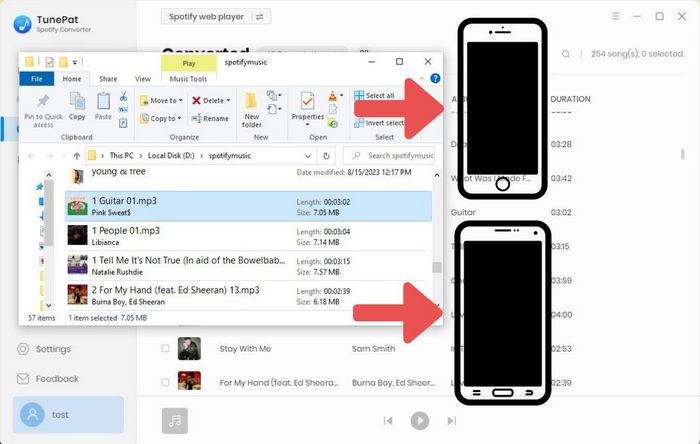
Step 5 Now that you have transferred the target song from Spotify to your computer, you can easily transfer it to your Android phone or iPhone via a USB cable. Open the video with a video editing app on your phone, select the Spotify music that was transferred to your phone, import it into your video as BGM, then save the video and upload it to your Instagram as a story. All done!




Olivia Anderson
Senior Writer